Low-code Threat Investigation Using Neo4j AuraDB and Bloom

Why Open-Source Cyber Intelligence?
Open-source Cyber Threat Intelligence (OSCTI) has become popular among security professionals and organizations due to its accessibility, cost-effectiveness, flexibility, quality, transparency, and innovation.
OSCTI aims to improve organizations’ overall security posture by making it easier for them to access and use threat intelligence data and tools. By sharing data and tools openly and collaboratively, organizations can work together to better understand and respond to the evolving threat landscape.
Open-source intelligence (OSINT) is readily available and accessible to a large community of experts, making it easier to share information and collaborate on threat intelligence. There are several OSINT platforms, such as AlienVault’s Open Threat Exchange (OTX) and the Cyber Threat Alliance (CTA), that provide access to OSCTI reports and threat intelligence data.
OTX provides open access to a global community of threat researchers and security professionals. It now has more than 100,000 participants in 140 countries, who contribute more than 19 million threat indicators daily.
Yes — 19 million threat indicators every day. No human being would be able to track or investigate even 1 percent of this many things every day. More often than not, security experts need to start with a specific attack or vulnerability and navigate related intelligence through various and deep relationships in order to understand the full picture of the cyber threat.
There are already some platforms that can consolidate data into a single repository, provide search UI and a dashboard-like view, and allow users to navigate details through links on the page.

I will demonstrate a low-code approach to combine Bloom, the graph visualization tool from Neo4j AuraDB, with OTX to enable more powerful visual threat investigations — with no need for a data integration/ingestion pipeline to start with.
What’s Required?
1. AlienVault OTX API
AlienVault OTX already exposes RESTful APIs for external applications to query its database. The example below is to search for CVE-2017–0144, which is an indicator by its ID:
https://otx.alienvault.com/api/v1/indicator/cve/CVE-2017-0144
2. Neo4j AuraDB and Bloom
Neo4j AuraDB is a fully managed cloud graph database service. Built to leverage relationships in data, AuraDB enables lightning-fast queries for real-time analytics and insights. AuraDB is reliable, secure, and fully automated, enabling you to focus on building graph applications without worrying about database administration.
For experimental purposes, I am going to use the AuraDB free instance. It keeps a database created for up to 90 days and can store some data.
Once a graph DBMS instance is up, I will access a Bloom visualization UI to do an actual investigation. Bloom’s illustrative, codeless search-to-visualization design makes it the ideal interface for fostering communication among peers, managers, and executives and for sharing the innovative work of their graph development and analytics teams.
It may be helpful to get familiar with the UI and operations of a new visualization tool, and here is a good source of reference:
Bloom quick start – Neo4j Bloom
If reading seems too boring, there is a recent video tutorial:
Step-by-Step Guide
1. Create Database Schema
Once the AuraDB instance is up, go to the console page and click the Query button to launch the Neo4j Browser.
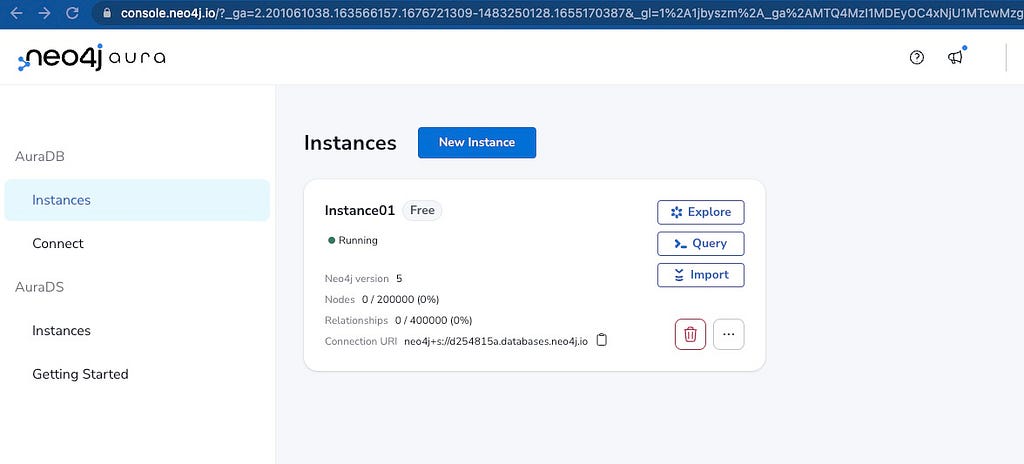
Log into the database using “neo4j” as username and the generated password. Copy and paste the following lines into the text box to execute them:
CREATE CONSTRAINT FOR (n:pulse) REQUIRE n.id IS UNIQUE;
CREATE CONSTRAINT FOR (n:malware_family) REQUIRE n.id IS UNIQUE;
CREATE CONSTRAINT FOR (n:reference) REQUIRE n.url IS UNIQUE;
CREATE CONSTRAINT FOR (n:country) REQUIRE n.name IS UNIQUE;
CREATE CONSTRAINT FOR (n:attack) REQUIRE n.id IS UNIQUE;
CREATE CONSTRAINT FOR (n:tag) REQUIRE n.name IS UNIQUE;
CREATE CONSTRAINT FOR (n:indicator) REQUIRE n.indicator IS UNIQUE;
CREATE CONSTRAINT FOR (n:indicator) REQUIRE n.id IS UNIQUE;
CREATE CONSTRAINT FOR (n:pulse_collection) REQUIRE n.indicator IS UNIQUE;
CREATE CONSTRAINT FOR (n:type) REQUIRE n.name IS UNIQUE;
CREATE CONSTRAINT FOR (n:indicator_collection) REQUIRE (n.pulse_id, n.type) IS UNIQUE;

It should be quite simple to figure out that the above statements have created several uniqueness constraints in the database for nodes of certain label, on specific property. For example:
CREATE CONSTRAINT FOR (n:indicator) REQUIRE n.id IS UNIQUE;
It is to create a constraint to ensure that the property ID of every indicator node is always unique. Indicator refers to the Indicator of Compromise (IOC).
As a schema-lite native graph database, which implemented a labeled property graph (LPG), indicator is the label for a group of nodes. For more information about LPG and graph modeling, check out:
Graph database concepts – Getting Started
2. Launch Bloom and Import a Perspective
Go back to the Neo4j Aura console and click the Explore button to launch Bloom.

Once done, go to my GitHub repo to download the Perspective for cyber intelligence investigation.
In Neo4j Bloom, a perspective defines a certain business view or domain in the target Neo4j graph. A single Neo4j graph can be viewed through different perspectives, each tailored for a different business purpose. Perspectives define:
- Categorization of business entities
- Property visibility and value type
- Relationship visibility
- Styling (color, icon, caption)
- Custom search phrases and scene actions
Follow the steps below to import the perspective:
Check the default perspective.
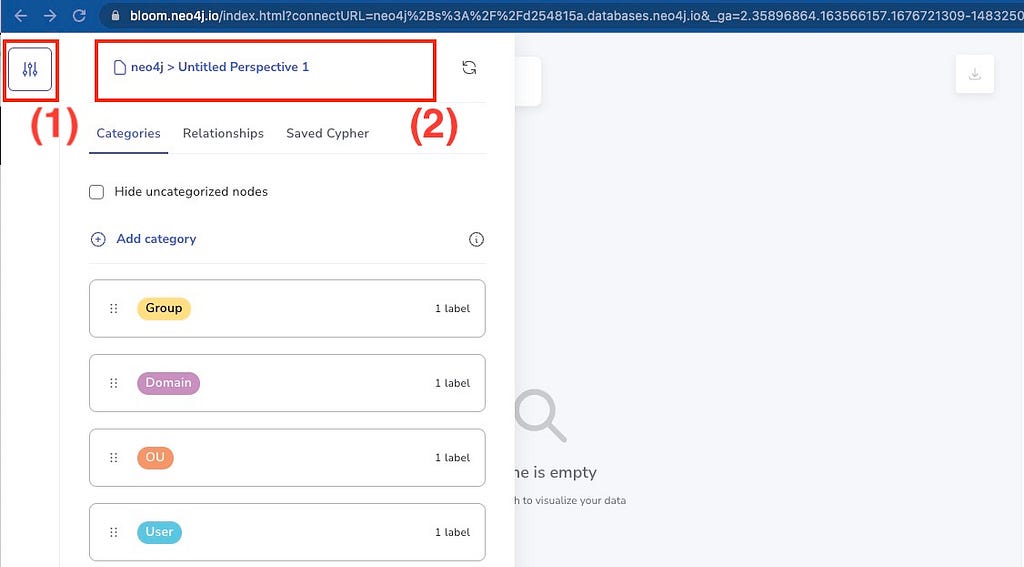
Import the newly downloaded perspective and choose to use it.

3. Explore WannaCry Ransomware Intelligence
Now we are ready to go!
One of the most famous and impactful ransomware attacks is WannaCry. First discovered in May 2017, WannaCry is a ransomware worm that spread rapidly around the world, infecting hundreds of thousands of computers in more than 150 countries.
The WannaCry attack significantly impacted businesses, healthcare organizations, and government agencies, causing widespread disruption and significant financial losses. The attack served as a wake-up call for organizations to prioritize their cybersecurity measures and highlighted the importance of regularly applying software updates and patches to address known vulnerabilities.
WannaCry used a vulnerability in Microsoft Windows operating systems (known as CVE-2017–0144) to spread from one infected computer to others on the same network. Once installed, the malware encrypted files on the infected computer and demanded a ransom payment in exchange for the decryption key. So let’s start with this CVE.
Start by typing “Search” in the text box at the top-left corner of Bloom. The suggested search phrase of “Search for CVE-” appears in the drop-down list. Select it and complete it to say “Search for CVE-2017–0144,” before pressing Enter to execute the search.
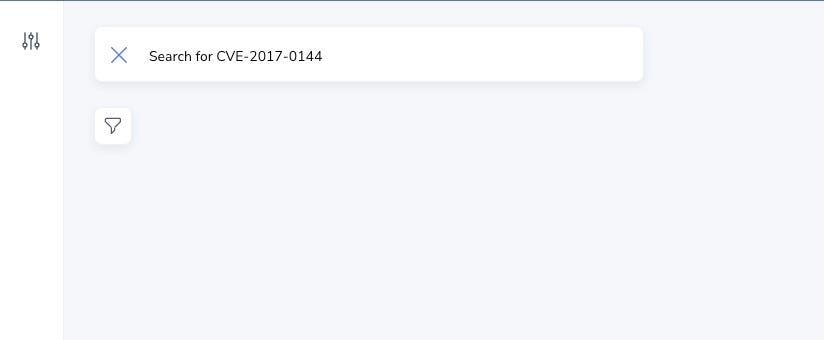
This will trigger the execution of a background Cypher query to call an OTX API. The results are shown below.

This CVE has 50 pulses in the OTX repository. By default, Bloom applies a force-based styling rule to arrange the layout of the graph. It also supports the hierarchical layout, which can be useful for seeing the layered structure more clearly.
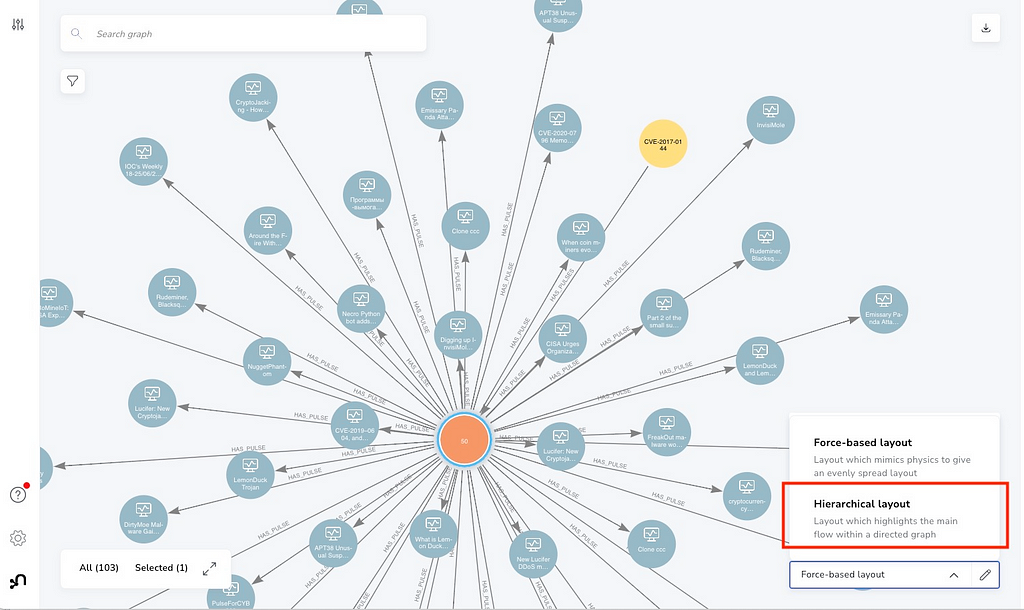
Below is the result after switching to a hierarchical layout.

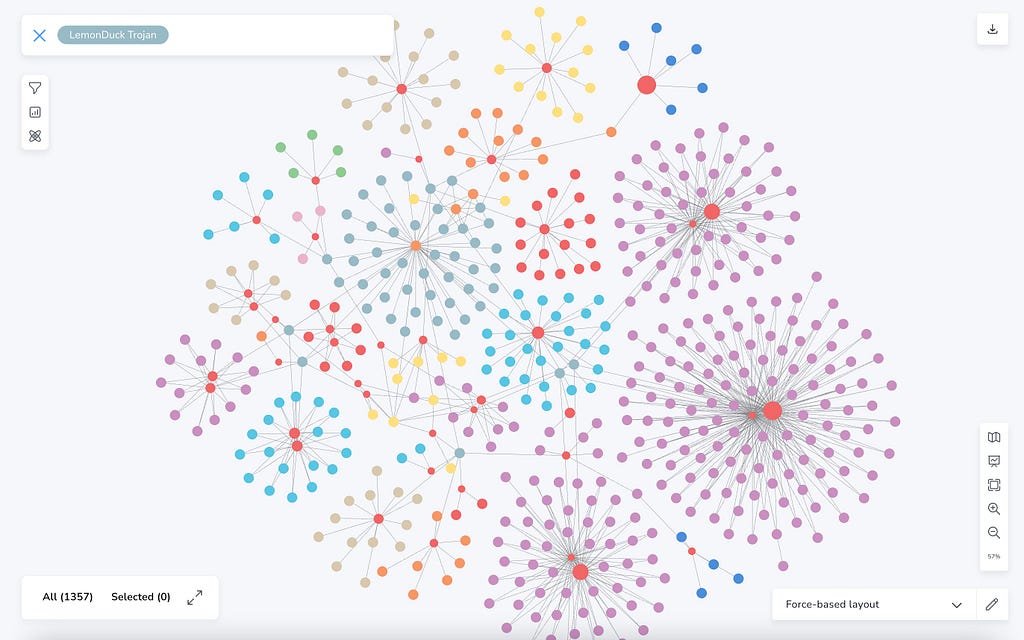
Let me choose one pulse — LemonDuck Trojan — to dig deeper. Here are the steps:
1. Type “LemonDuck Trojan” in the text box and press Enter. This will search for the text and bring matched nodes/circles to the center of the screen.
2. Double-click the node representing LemonDuck Trojan to see its properties displayed in a pop-up panel to the left.
3. Left-click the node, and then right-click it to see the quick menu. Because there is no related data in database about this pulse yet, we see menu item Expand is disabled.

In this case, let’s select menu item Scene Action > Get pulse info. This will trigger another saved Cypher query to call the OTX API to get related pulses.

4. There are several hundred other related indicators. Let’s find domains (12 total) and locate the node representing ackng.com. From there, we will choose the scene actions to get related IPs for this domain.

This discovery process can simply go on and on until we have a holistic picture of the threats. The Bloom perspective has included conditional styling for indicators, which assigns a unique color for each indicator type (e.g., FileHash-MD5, Hostname, Domain etc.).
Further Discussion
In this short tutorial, I walked through steps to conduct a cyber threat investigation powered by graph visualization, using an empty (and free) Neo4j AuraDB, Bloom, and almost no code.
While open-sourced cyber threat intelligence has made a lot of valuable information much more accessible to security experts, it could easily make users feel overwhelmed. The navigation of related information through page links provides little help for an efficient and productive investigation. Through graph visualization and on-demand intelligence retrieval, it has offered an innovative approach to empower security experts to select what threat intelligence to look into and help them understand the scope, impacts, and correlations of cyber threats much more easily.
Through features like Save Cypher and Scene Actions, scenario-specific analysis using Cypher, Neo4j’s graph query language, is easy to implement. It is also pretty easy to provide a comprehensive and seamless way to access information from disparate sources of cyber threats without the need to manually switch between them.
Empowering Open-Source Cyber Threat Intelligence Analysis With Graph Visualization was originally published in Neo4j Developer Blog on Medium, where people are continuing the conversation by highlighting and responding to this story.


