NEuler: No-code graph algorithms
In this guide, we will learn about NEuler: The Graph Data Science Playground, a graph app that helps onboarding with the Graph Data Science Library.
Please have Neo4j (version 4.0 or later) downloaded and installed to use NEuler.
Beginner
What is NEuler?

NEuler is a no-code UI that helps users onboard with the Neo4j Graph Data Science Library. It supports running each of the graph algorithms in the library, viewing the results, and also provides the Cypher queries to reproduce the results.
We will use the terms 'Neuler' and 'The Graph Data Science Playground' interchangeably in this guide.
Installing NEuler
NEuler is a Graph Application (Graph App) that can be installed from the Graph App Gallery that comes installed by default on the Neo4j Desktop.
We can launch the Graph Apps Gallery by clicking on the right hand side of the 'Open' menu underneath a running database:
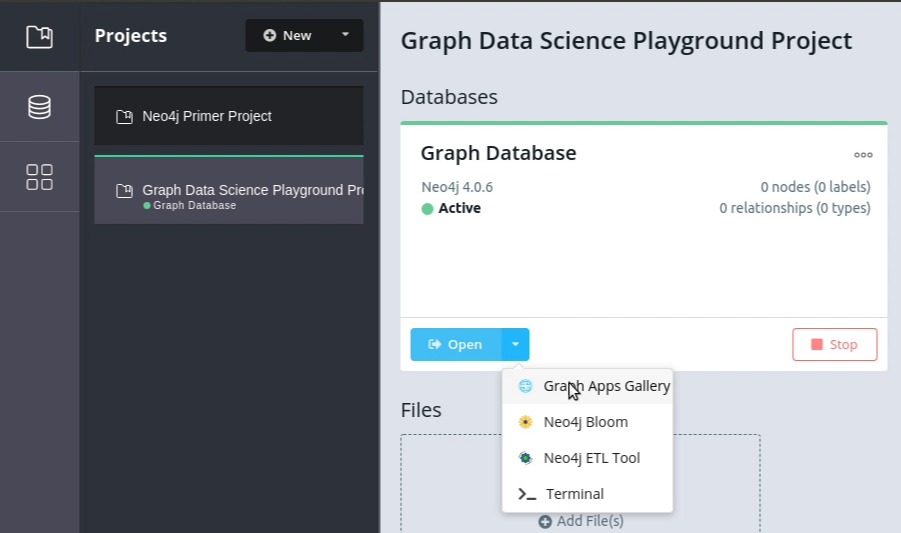
Once we’ve done that, we’ll see the following screen.
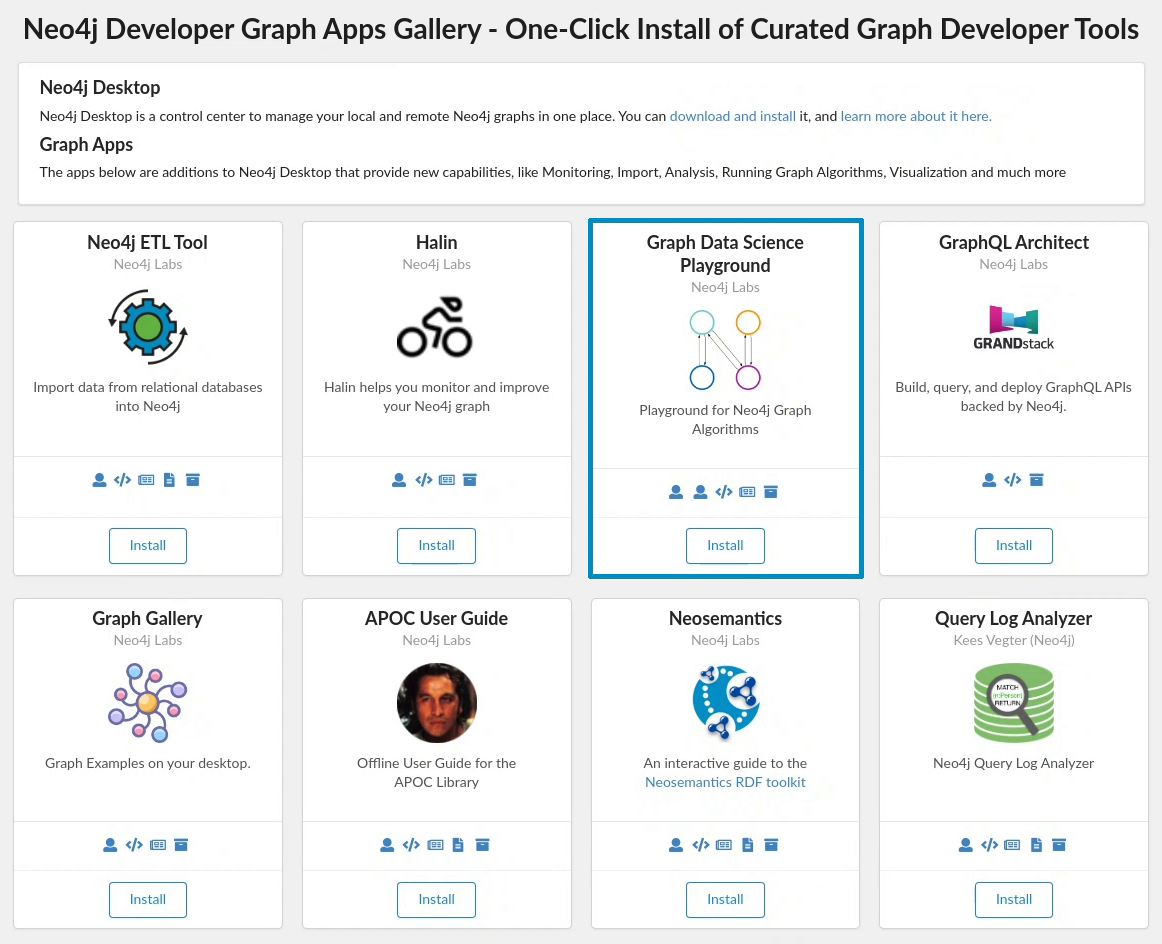
We can see the Graph Data Science Playground on the first row and, if we’re using Mac or Windows, we can install it automatically by clicking on the 'Install' button.
If we’re using a Linux based Operating System we’ll need to install it manually.
We can get the installation link by clicking on the  button.
Copy that link onto the clipboard and then paste it into the 'Install' section of the
  sub menu:
|
The installation link is https://neo.jfrog.io/neo/api/npm/npm/neuler in case you don’t want to get it via the Graph Apps Gallery! |
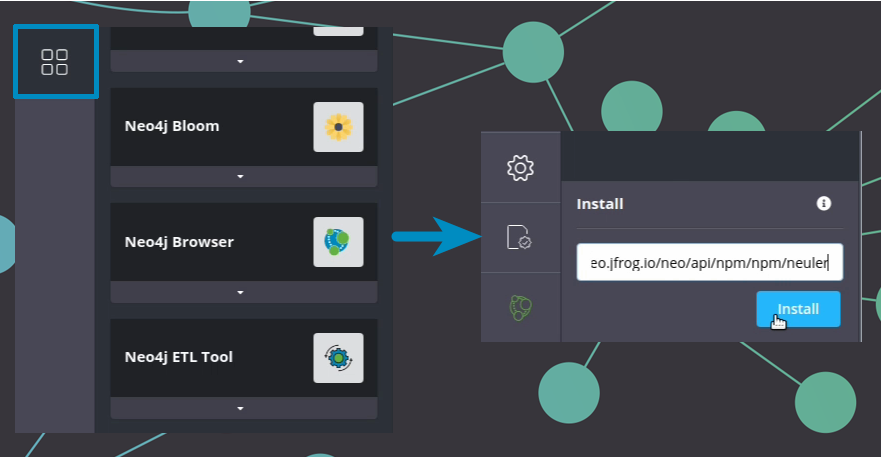
Once we’ve done that, we’re can launch NEuler. It will now appear under the menu that we get by clicking on the right side of the 'Open' button under our database, and the first time that we click on it we’ll be asked to install the dependencies:
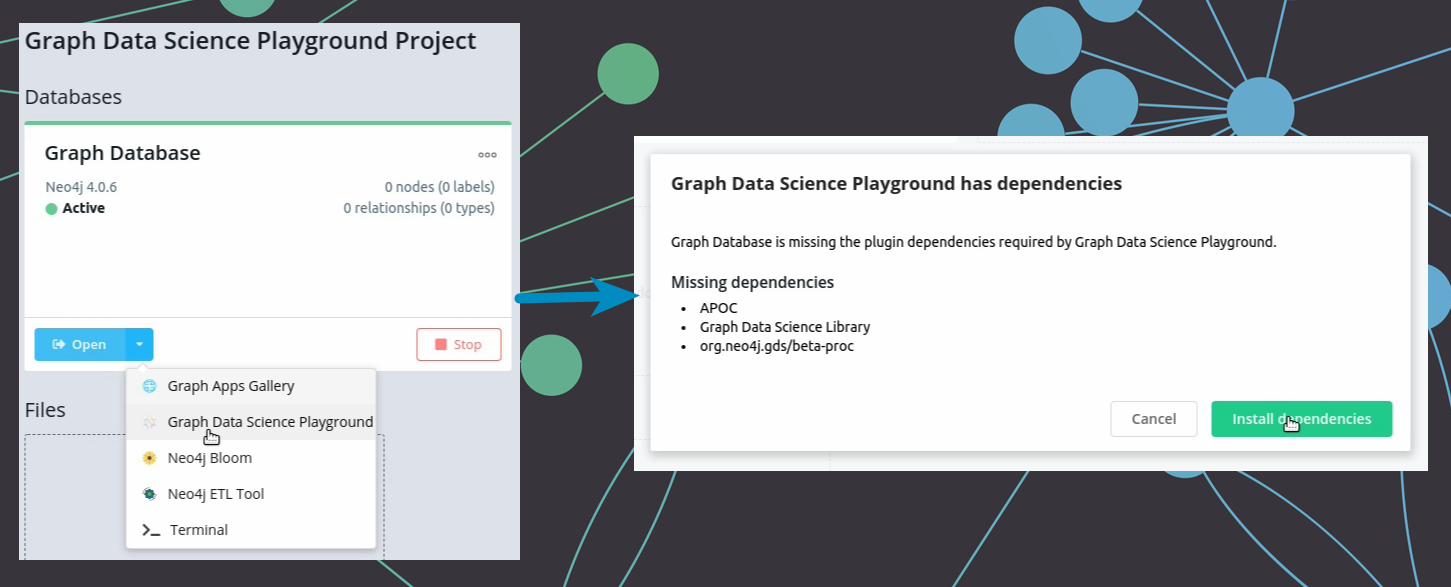
|
The Graph Algorithms Playground won’t work unless you install those dependencies, so make sure you click on the 'Install dependencies' button. |
Once the dependencies have been installed, The Graph Algorithms Playground will launch:
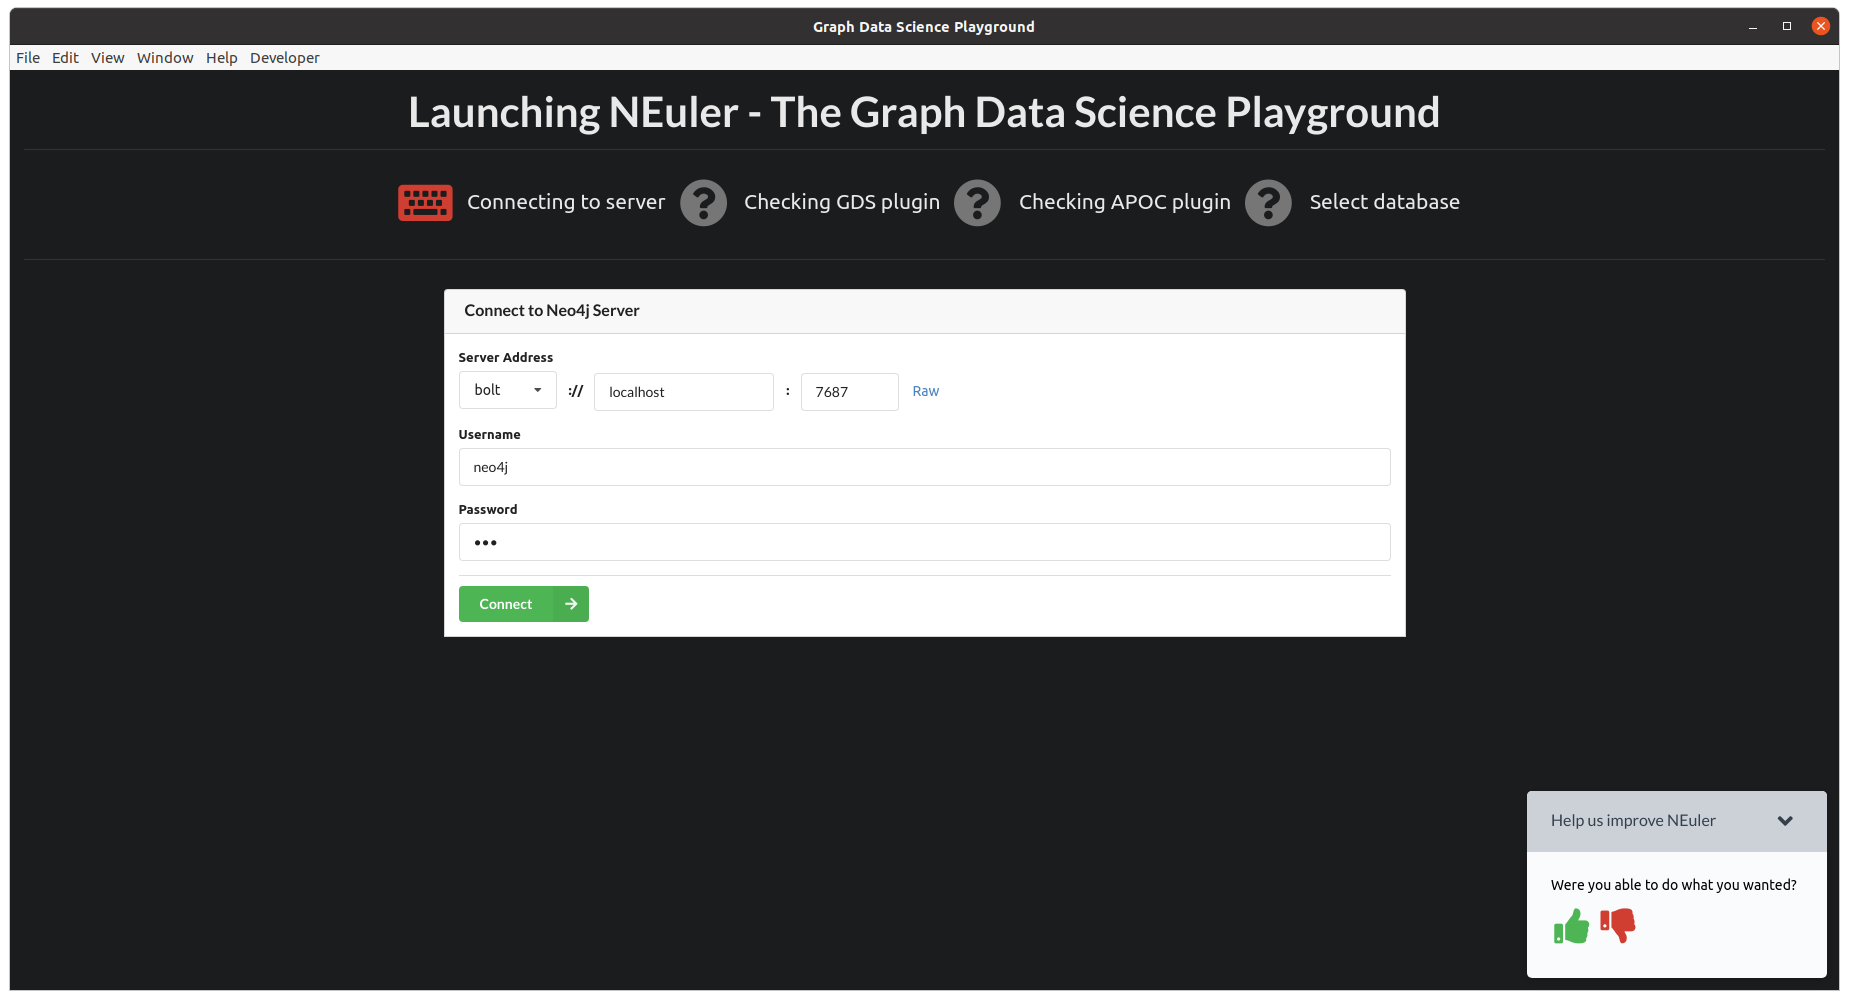
The credentials for the active database are pre-populated, but we can connect NEuler to any Neo4j database that has the APOC and GDS dependencies installed.
If we click on the Conenct button, the dependencies will be checked, and we’ll see the following screen:
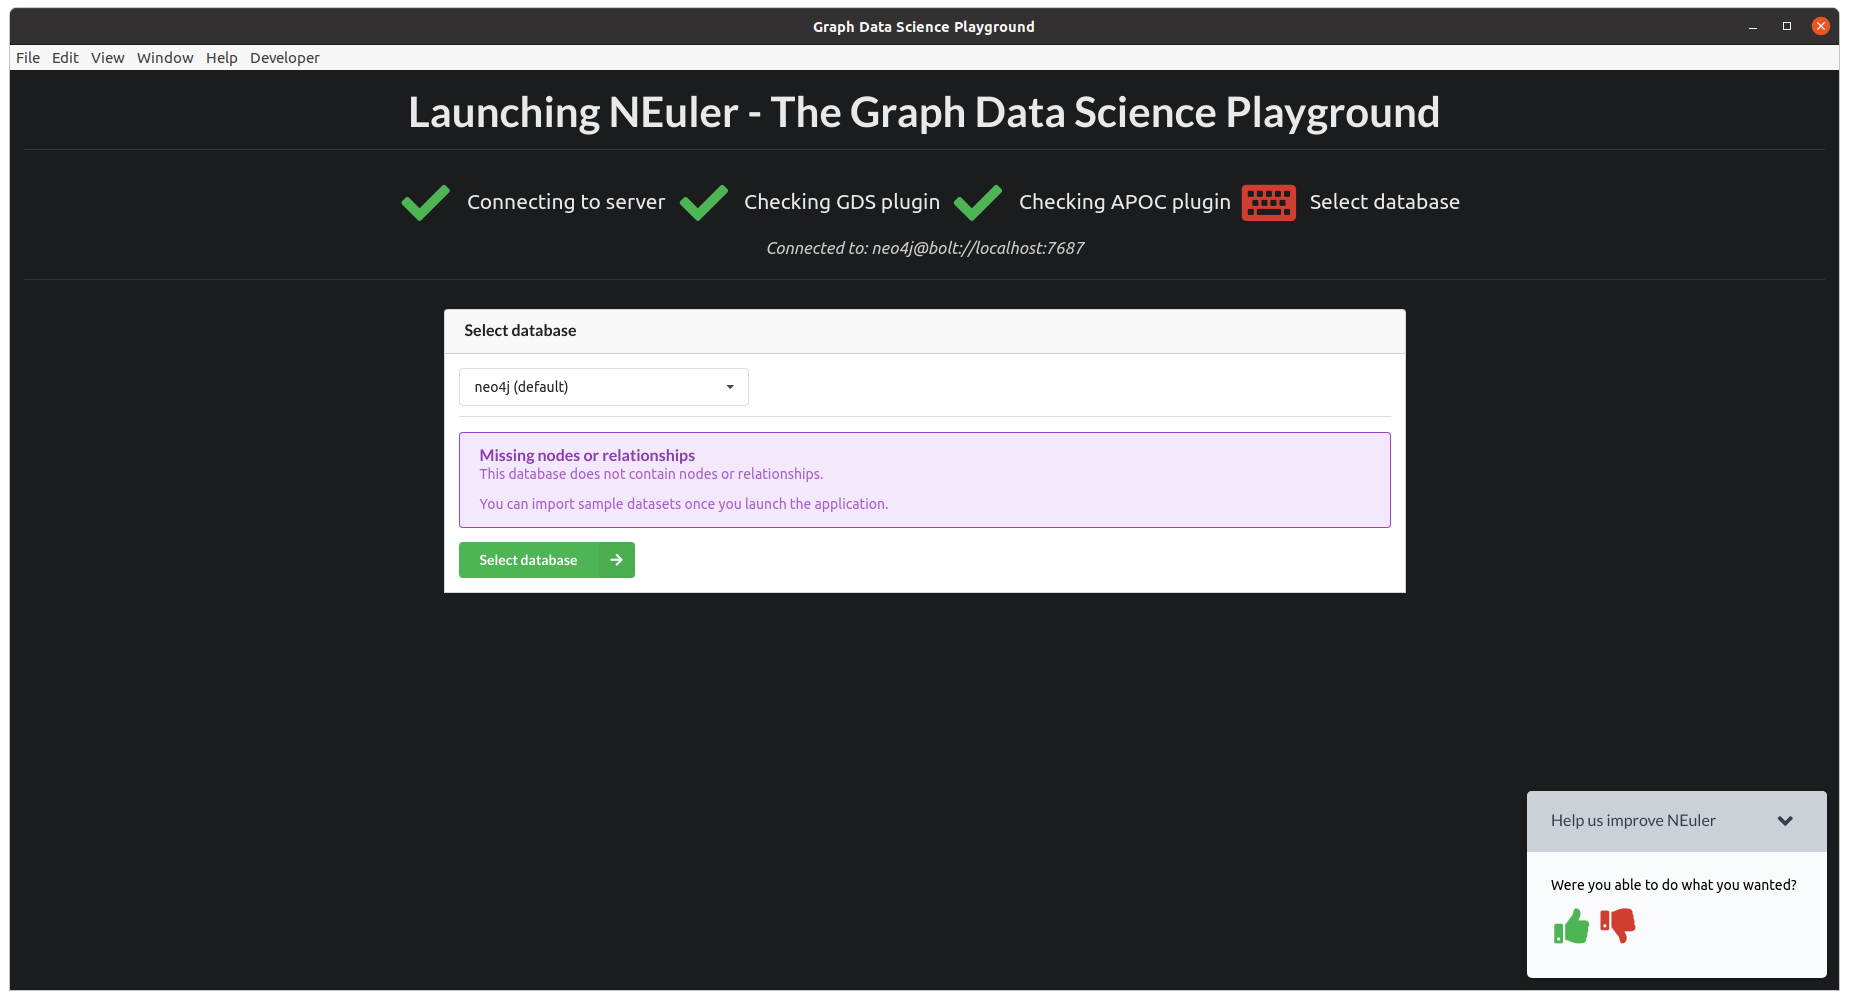
By default the 'neo4j' database is selected, but we can change the selection using the dropdown.
Let’s go with the default database and press the Select database button.
We’ll now see the following screen:
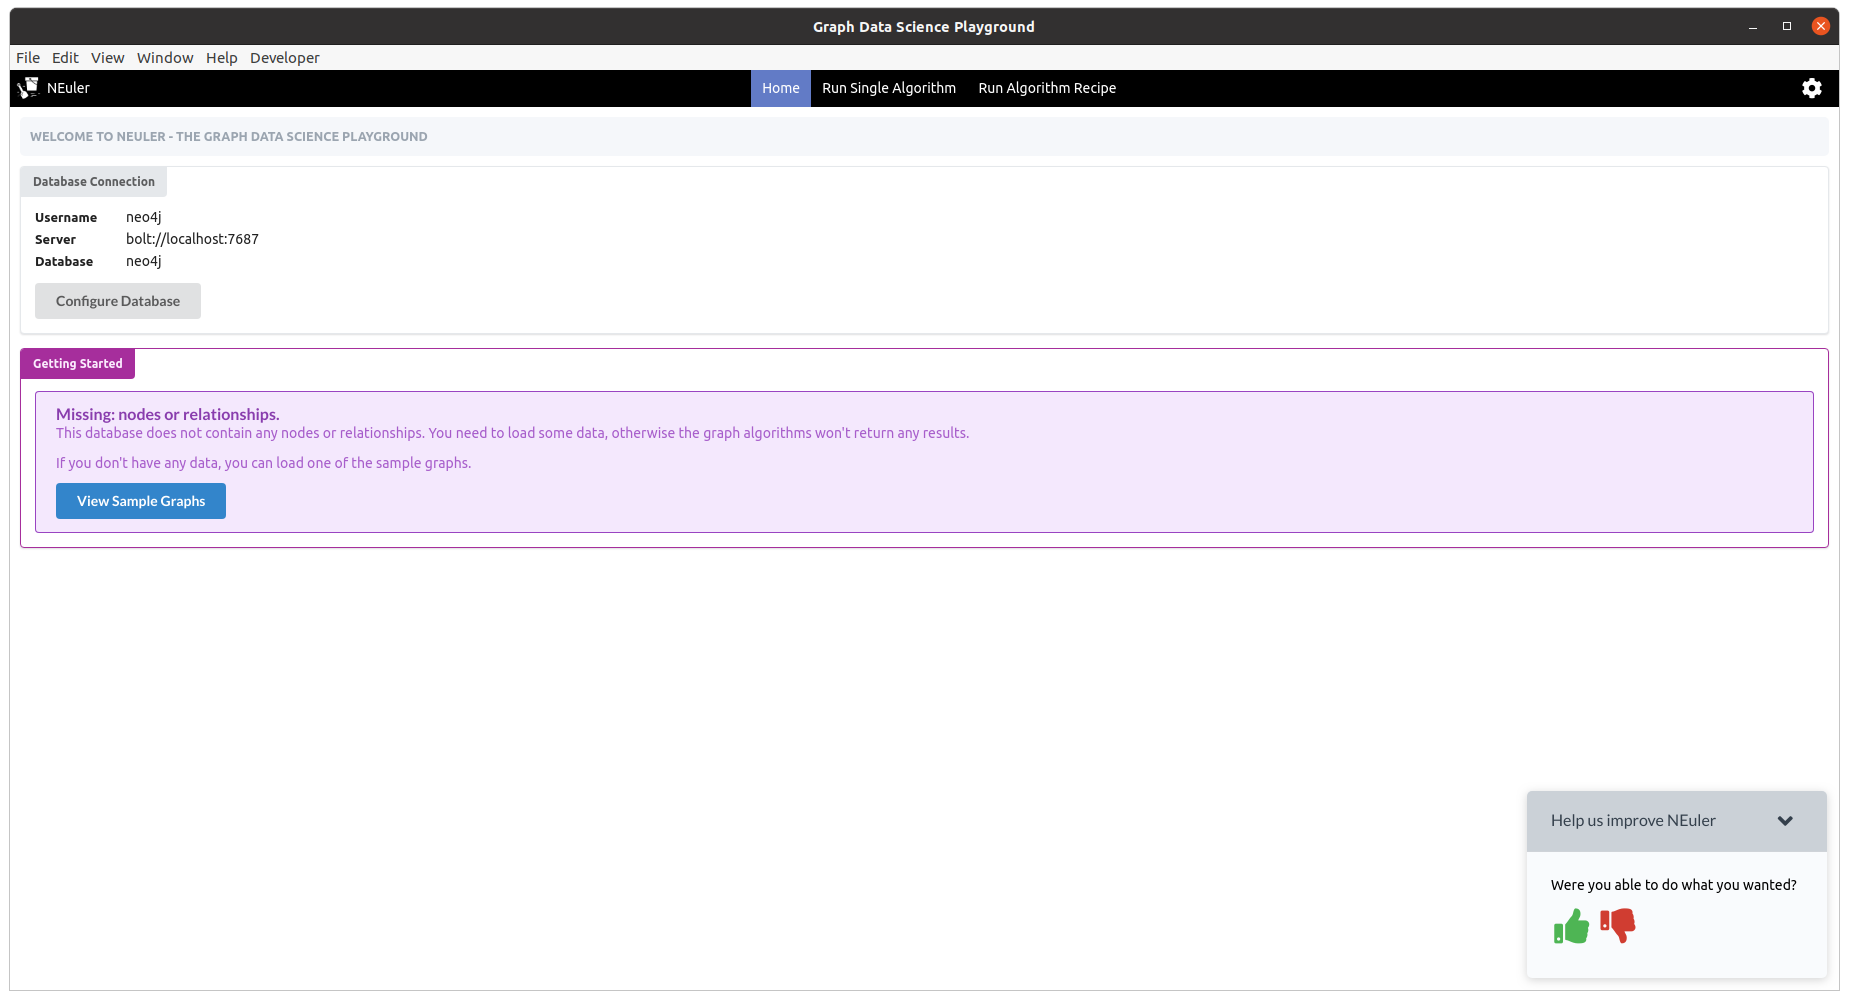
We’re now ready to start using the playground.
Loading sample datasets
Our database doesn’t contain any data at the moment, but luckily NEuler contains some sample datasets that will help us learn how to use the library. We’re going to use the Game of Thrones graph for the rest of this guide, and we can import this by following the screens in the GIF below:
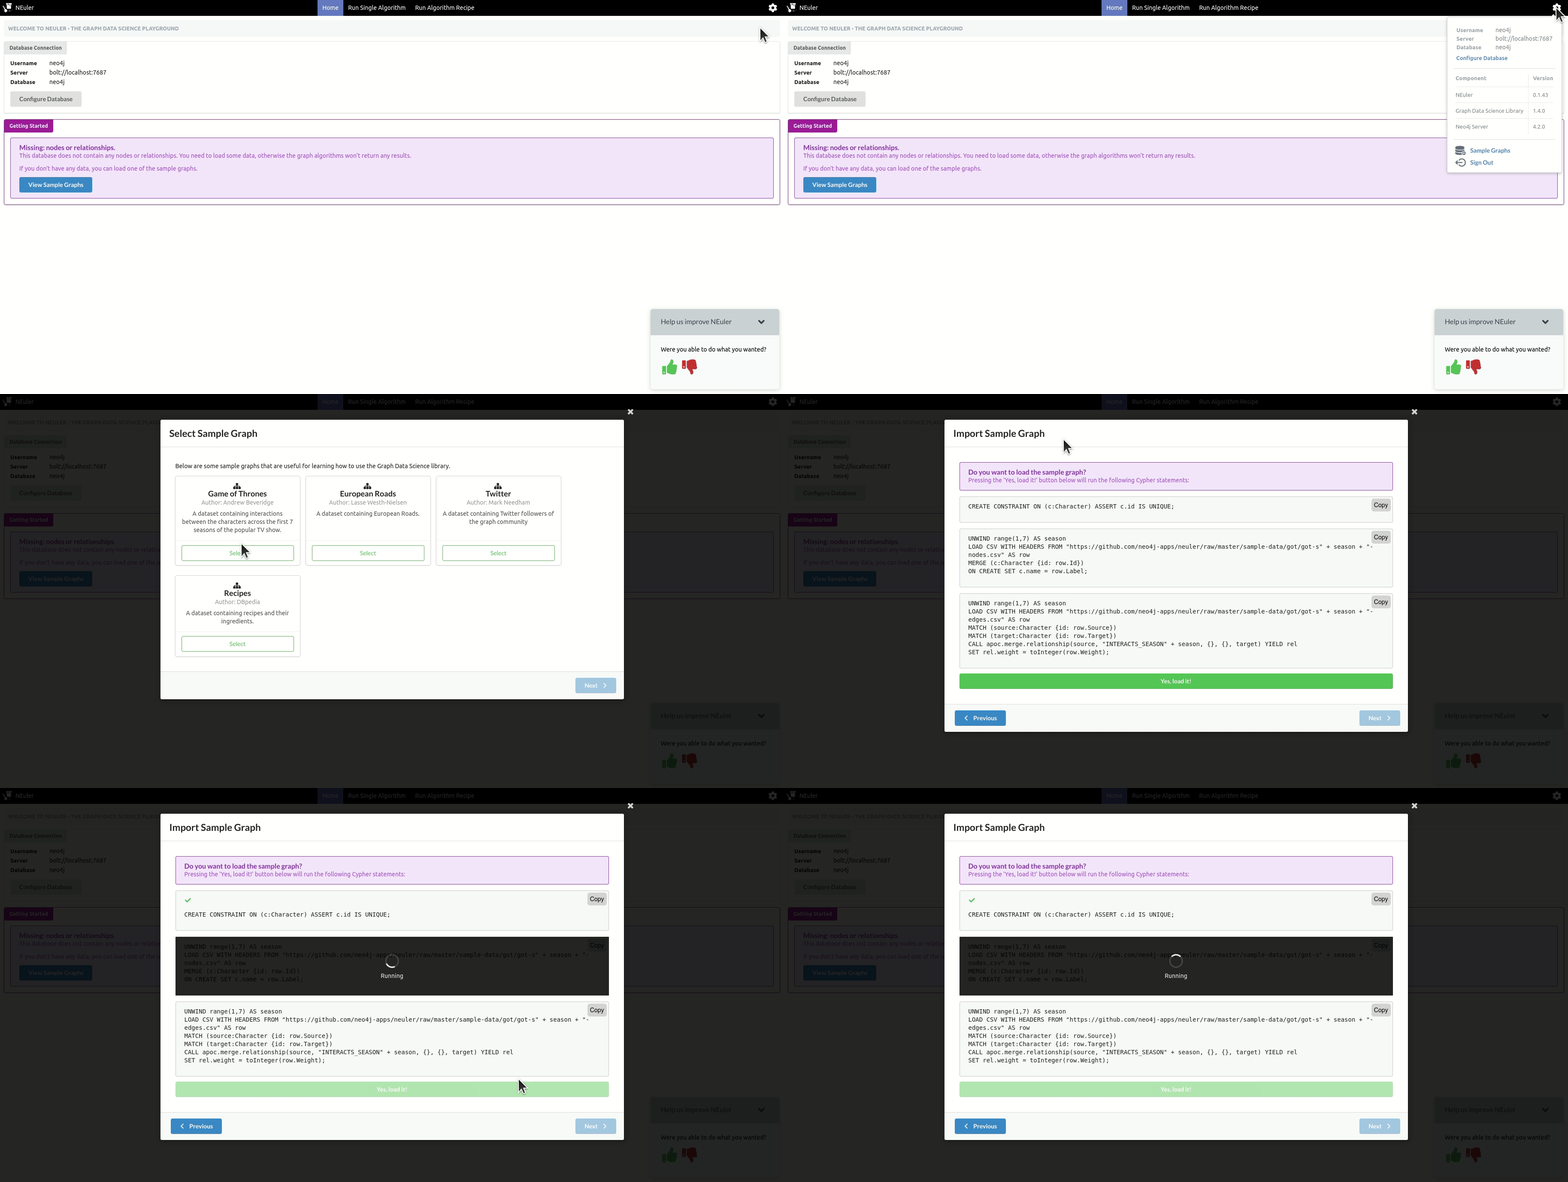
It will take about 20 seconds to get the data loaded and once its imported, the home screen will update to look like this:
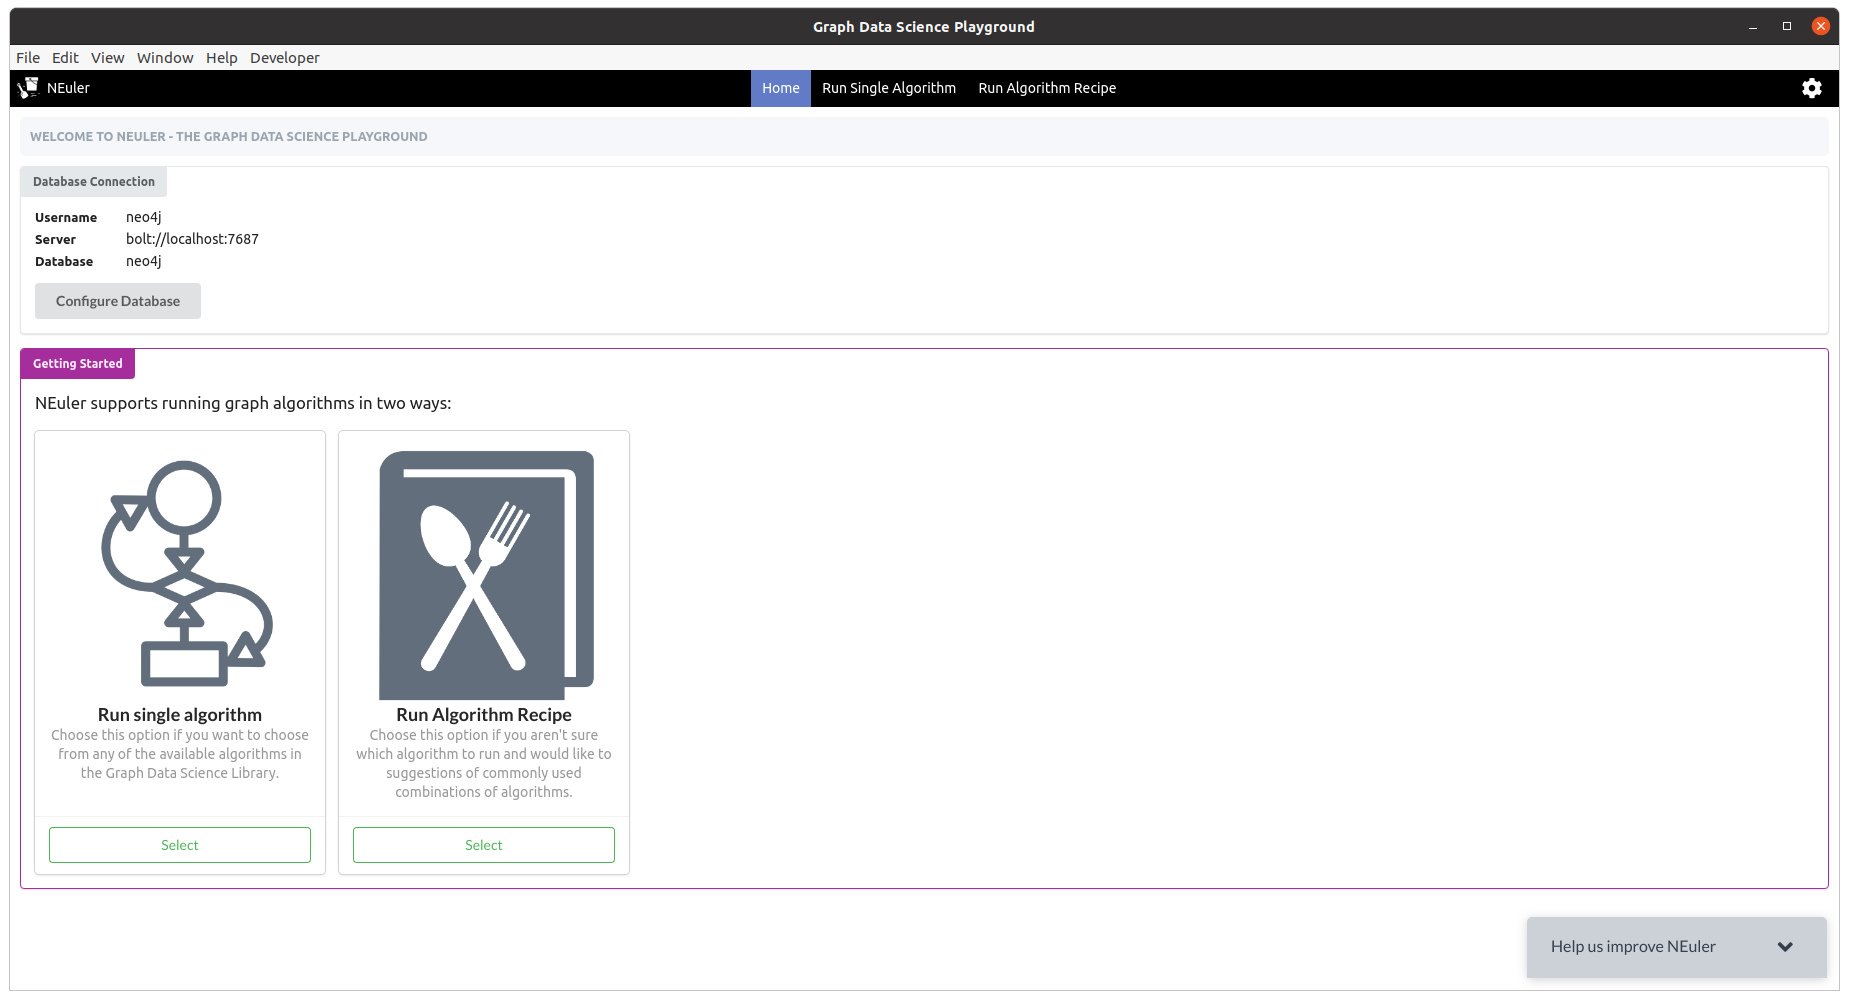
Now that we’ve got some data loaded, it’s time to start using the algorithms.
Configuring algorithms
We’ll click on the Run Single Algorithm link on the top menu, which will take us to the following screen:
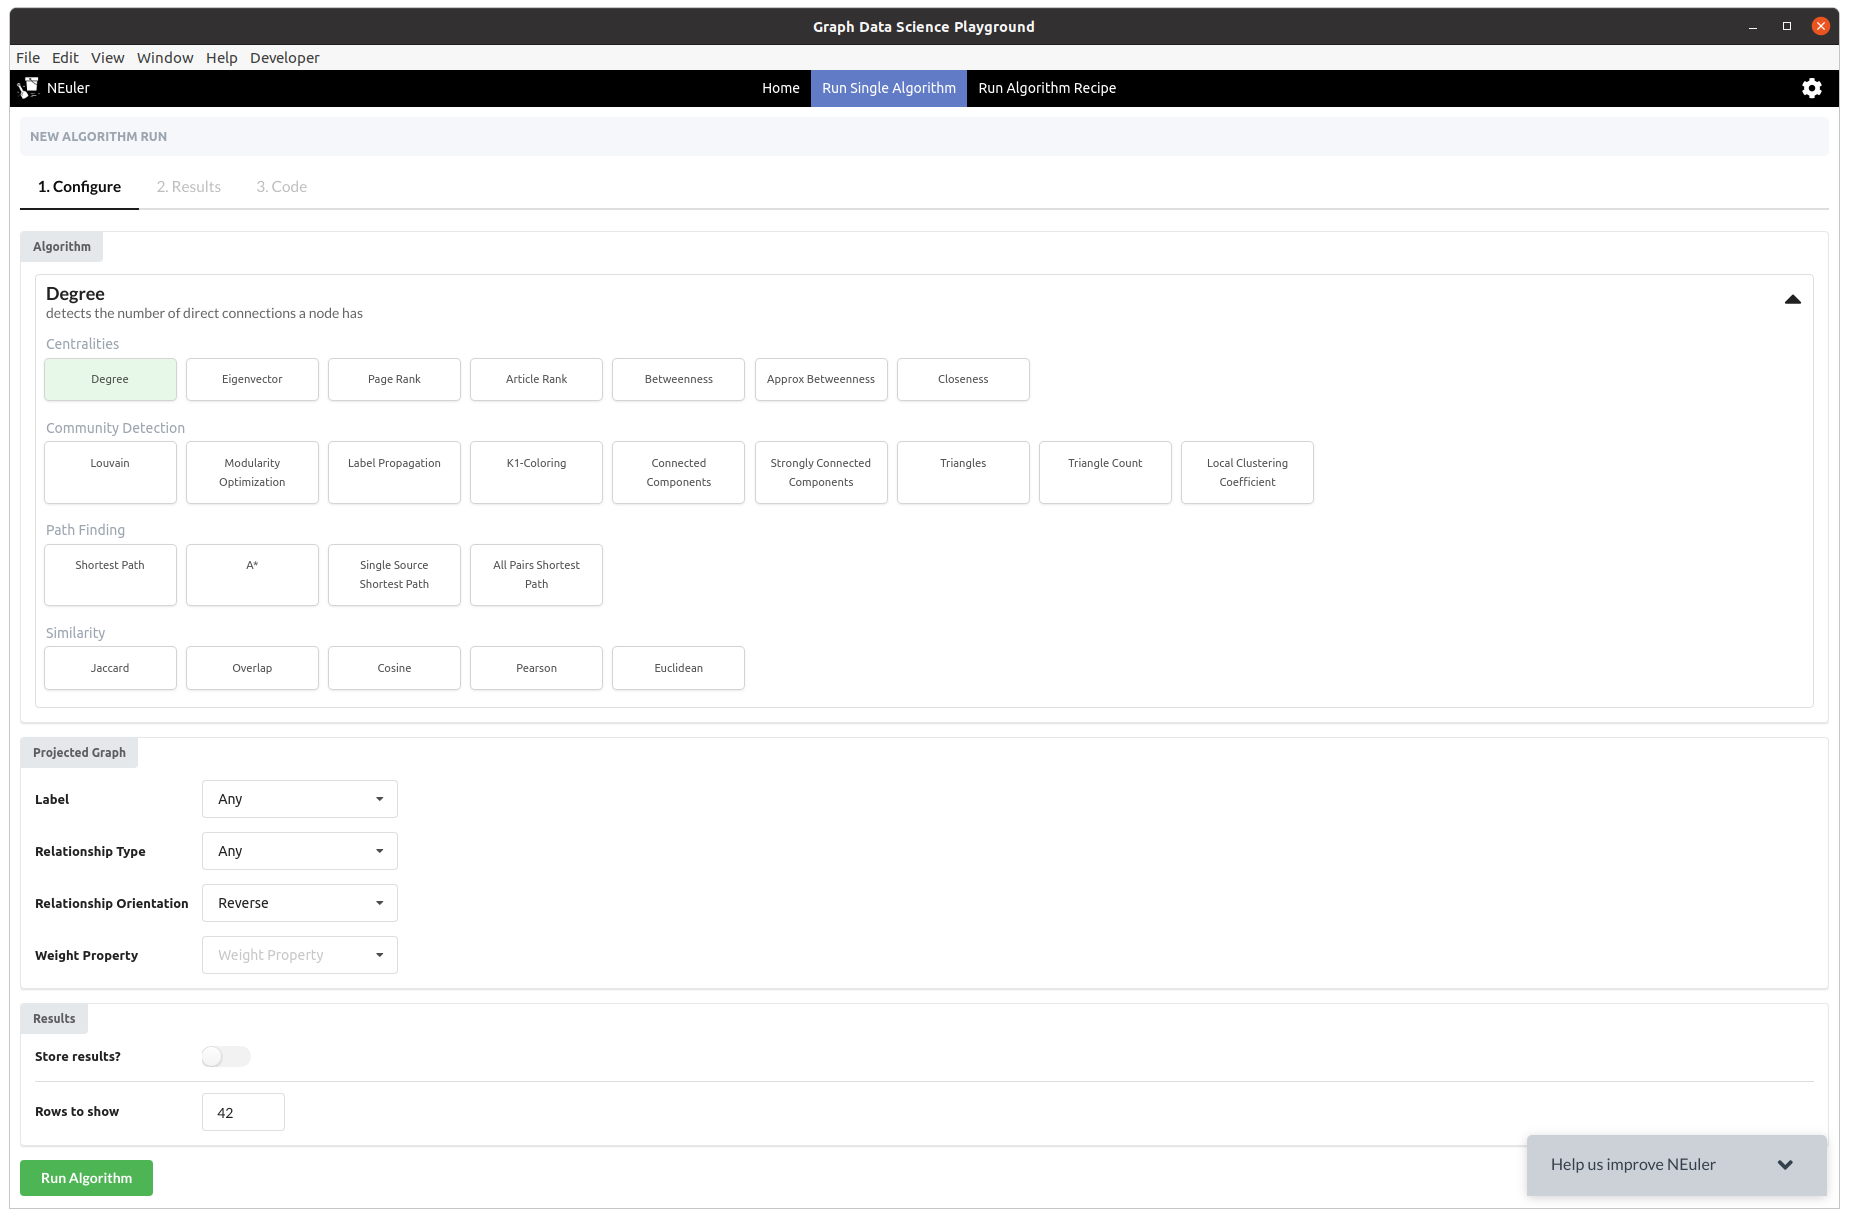
On this screen we can select an algorithm from any of the categories, configure the projected graph that the algorithm will be run against, as well as other parameters for more complex algorithms.
The form for configuring the PageRank algorithm, one of the most well known centrality algorithms, is shown in the screenshot below:
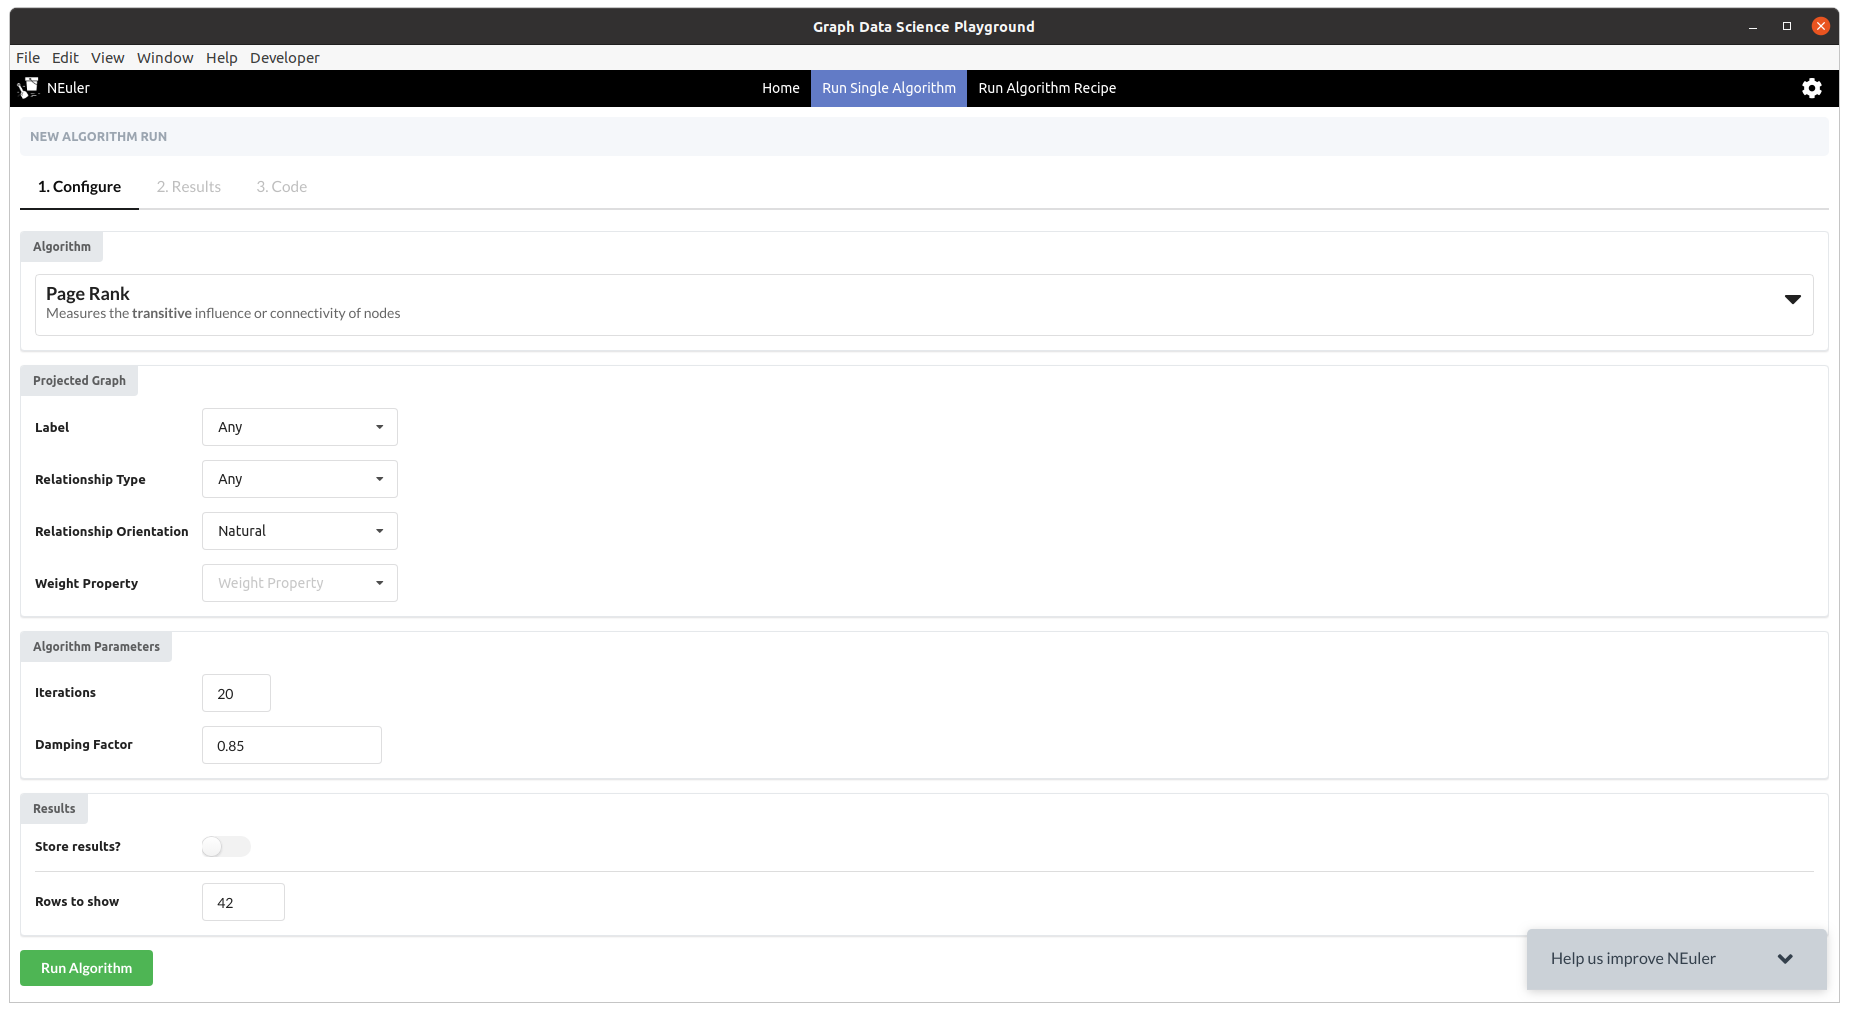
Once we’re happy with the configuration, we can execute the algorithm by pressing the 'Run' button.
Exploring results
Results from running the algorithm will be shown on the Results tab.
The output from running the PageRank algorithm against a projected graph of the interactions between Games of Thrones characters in Season 1 of the popular TV show can be seen in the diagram below:
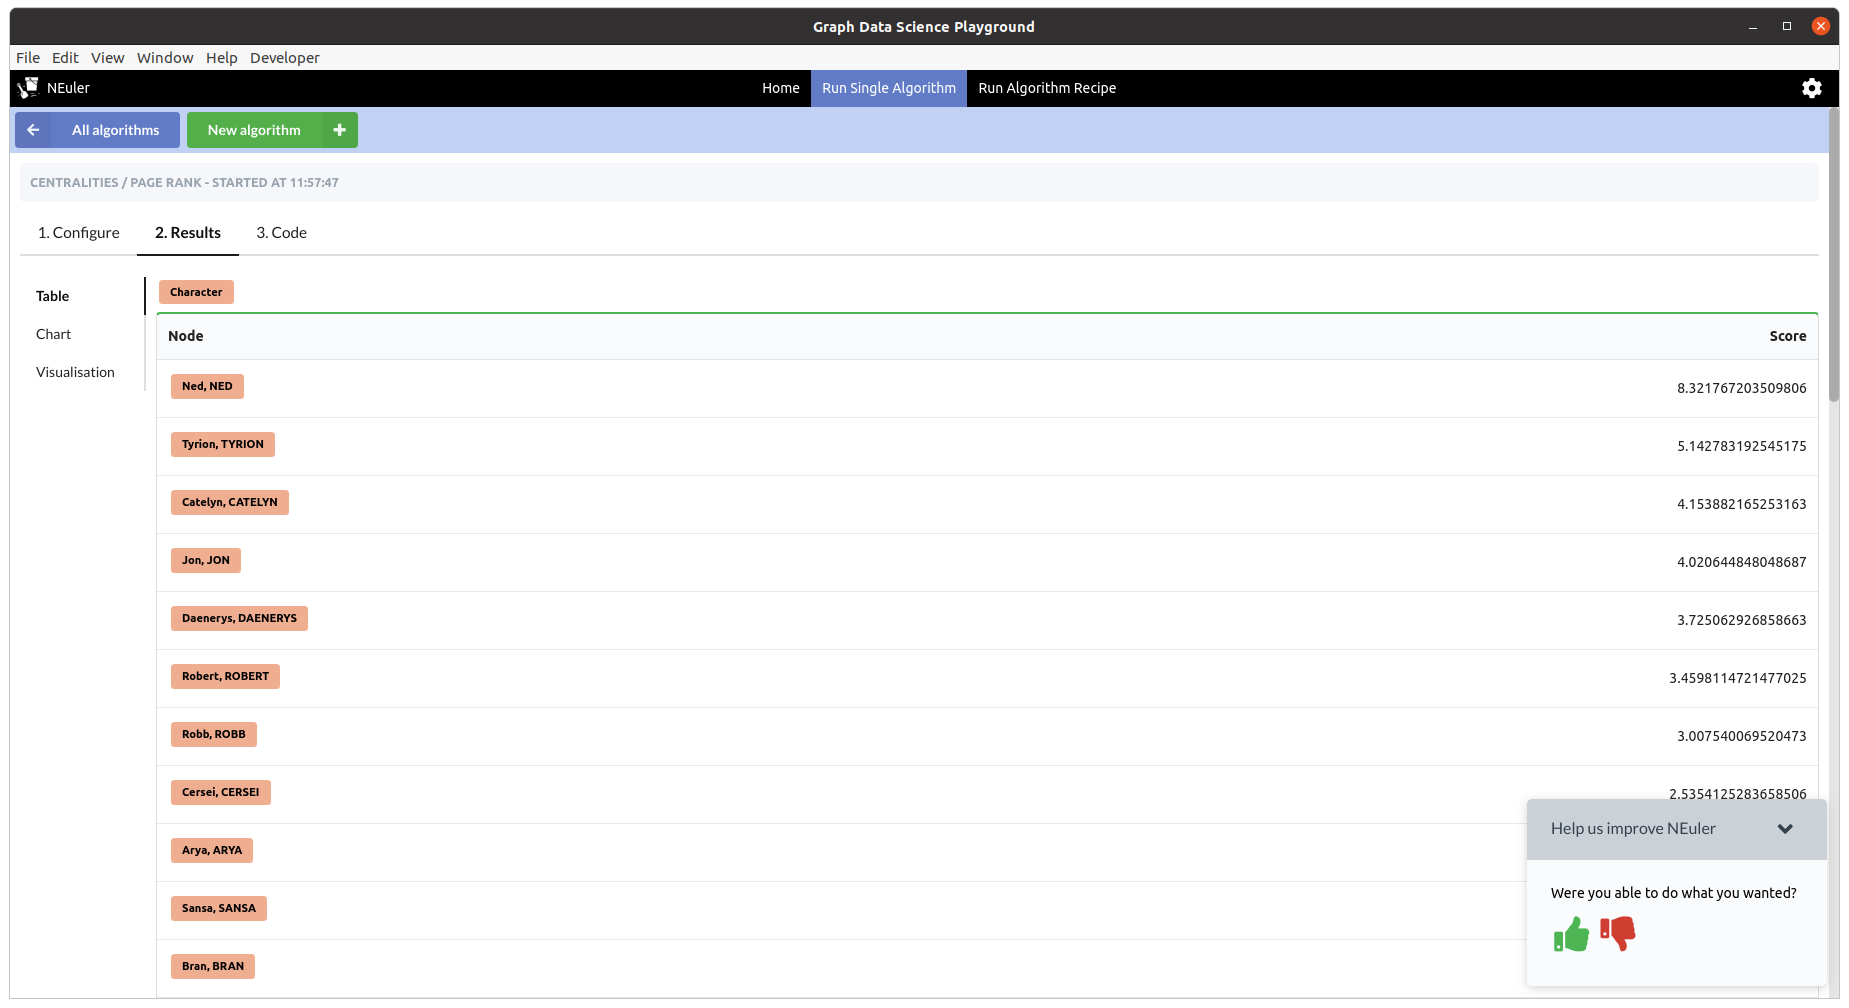
We can see that Ned is the most important character in the show in the early days. If we want to compute the results for another season, we can do that by changing the 'Relationship Type'.
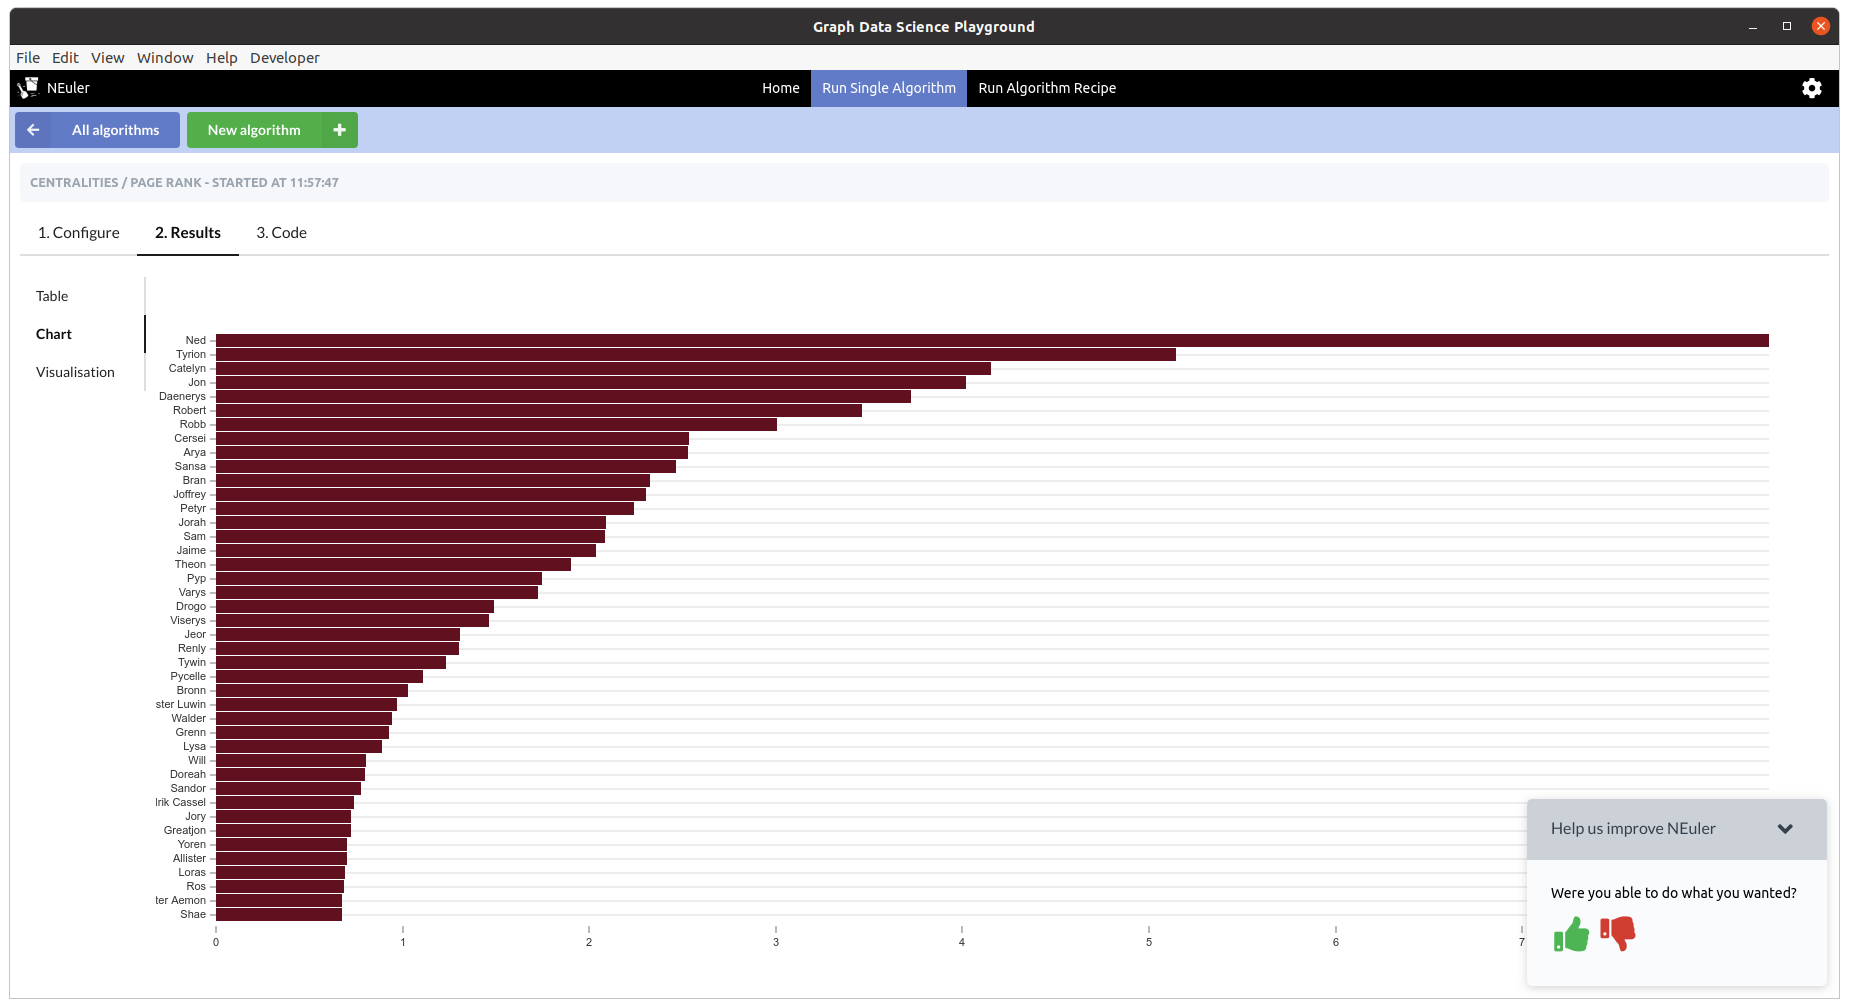
We can also view the results in chart or graph visualization formats. We can see the chart representation of PageRank run against the Game of Thrones graph in the screenshot below:
And a graph visualization of the algorithm run in the diagram below:
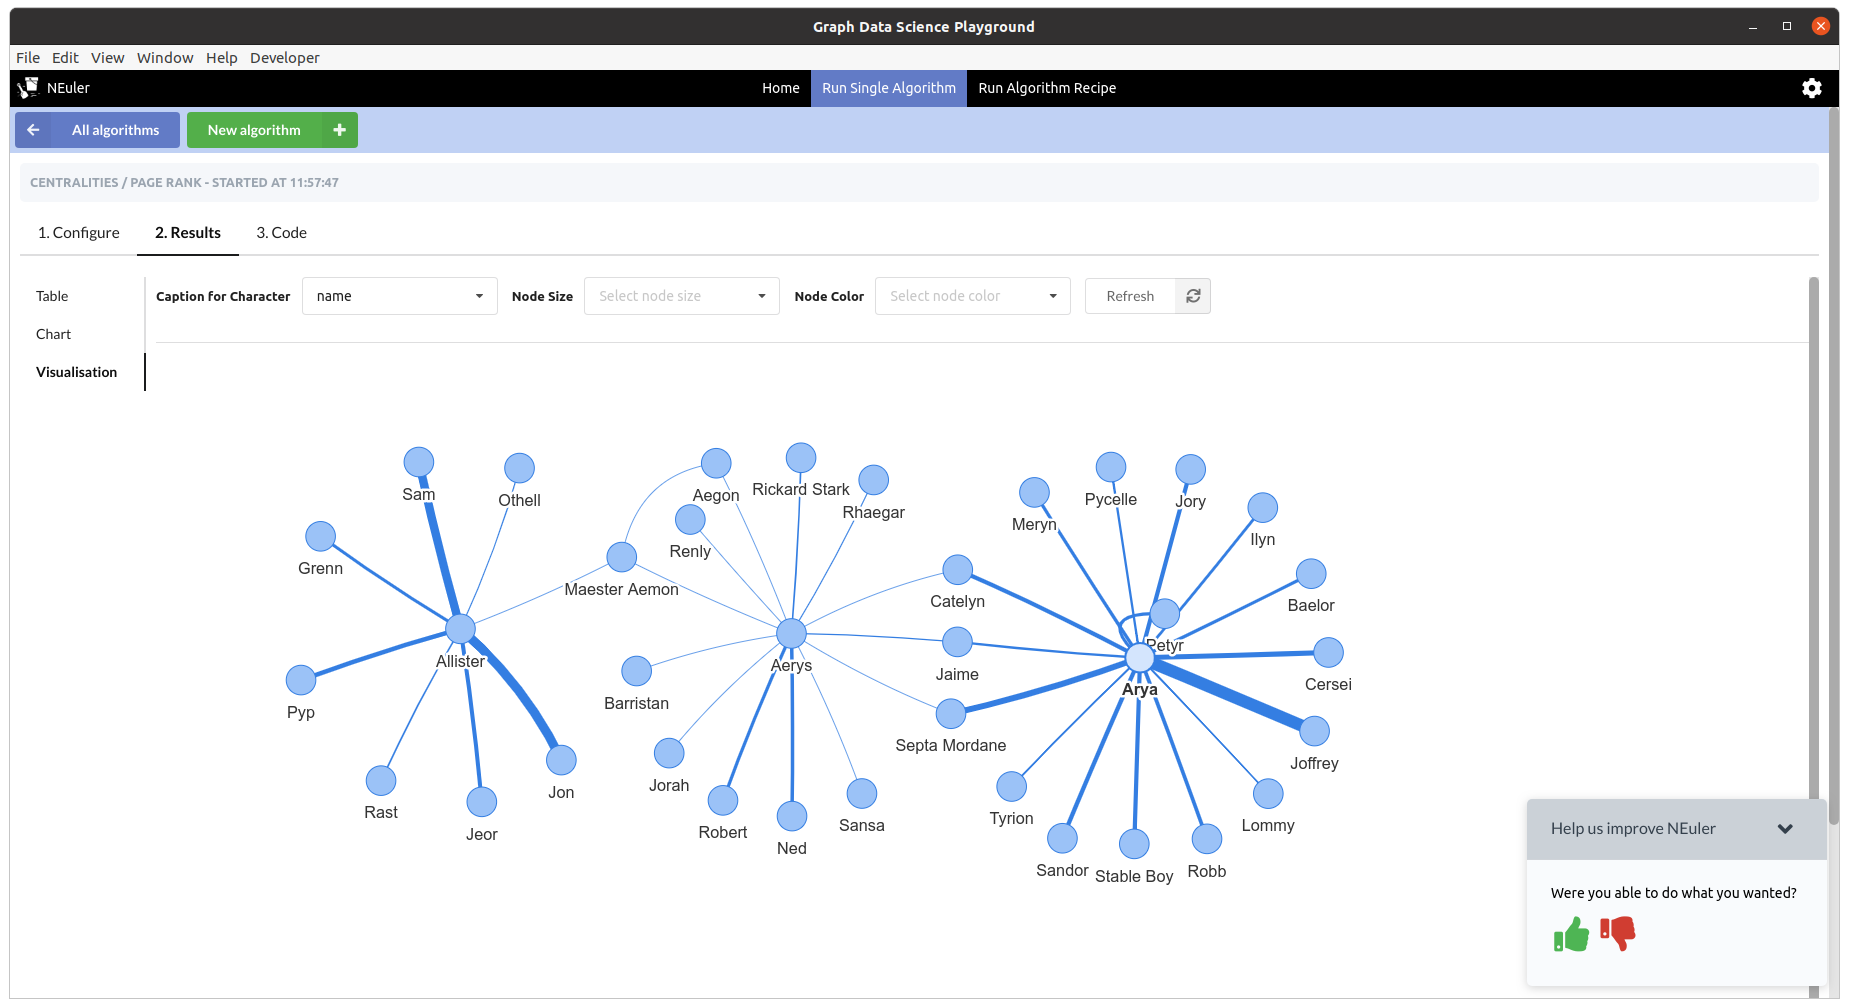
We can change configure the properties that select the caption, node size, and node color by using the dropdown menus above the visualization.
Seeing the code
Running algorithms in NEuler is intended as the first step in the process of learning how to use graph algorithms.
The next step is learning how to run the algorithms using the underlying procedures, and NEuler helps with this by describing the procedure calls in the Code tab.
The procedure call and parameter setup for running the PageRank algorithm is shown in the diagram below:
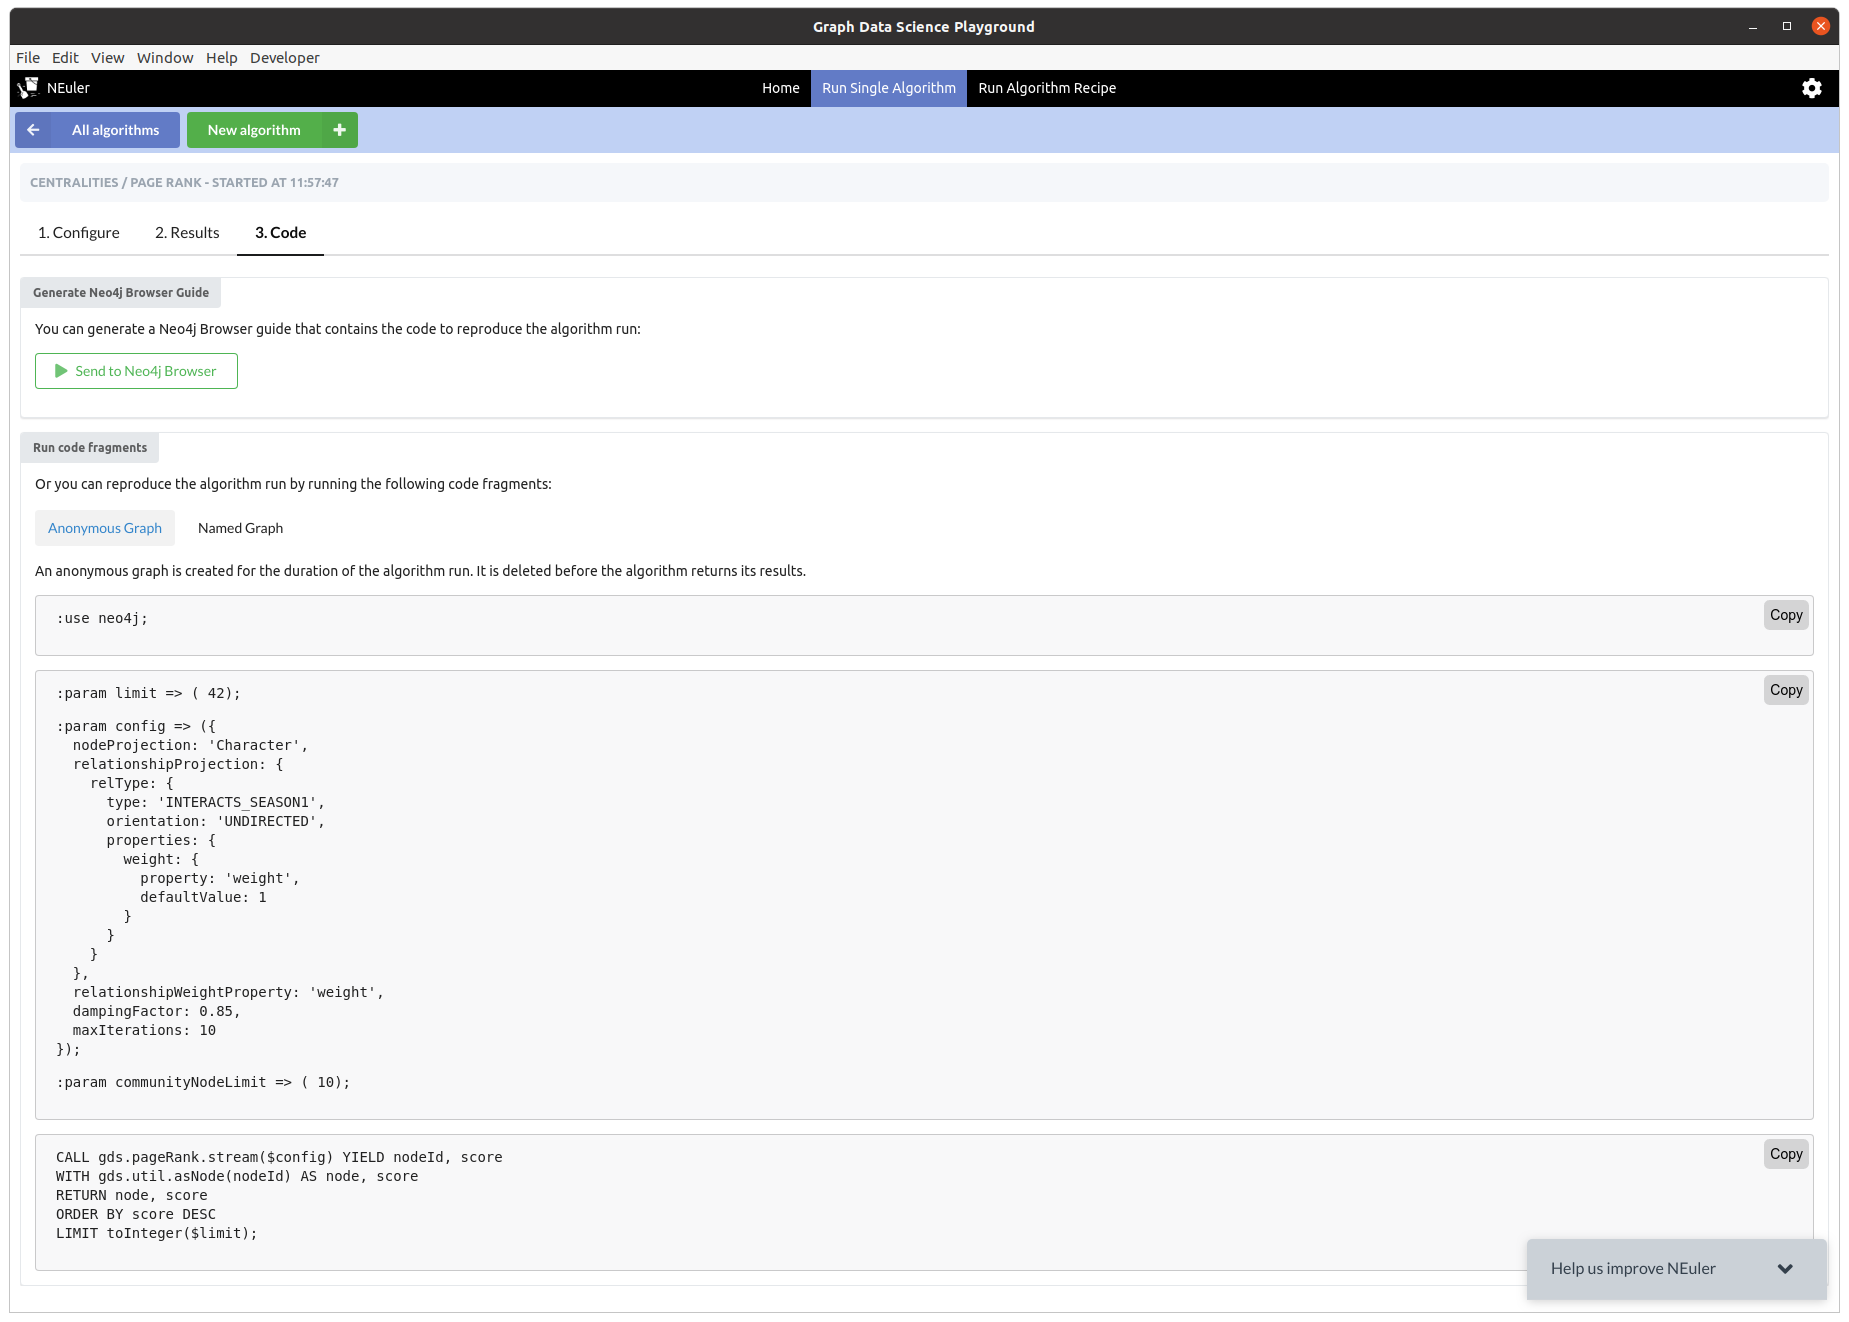
We can use the 'Copy' button on the top right of each window to copy the code fragment to our clipboard. Alternatively, we can create a Neo4j Browser guide by clicking on the 'Send to Neo4j Browser' button.
Was this page helpful?