
According to npm, about 40,000 people download the neo4j-driver each week.
But to my surprise, when I tried asking two months ago on the Neo4j Online Community the best way to mock calls to a Neo4j driver session, nobody suggested a particular tool or generalized approach.
It is not so straightforward to use a standard server mocker for the neo4j-driver, because the queries use a session object generated by the driver.
You can always stub out a function call, but it’s hard to get the output correct. The problem is that a query result includes an array of Recordget() method for the Records in your output. That method only exists if you are viewing a Result as created by the neo4j-driver.
I temporarily gave up and just included async calls to the session in my tests. But the calls to the session created lots of problems when I tried to use Test Driven Development (TDD). Also, they interfered with CI. Sometimes when I tried just making commits with a hook to test I had problems with timeouts and instability.
My underlying premise is that anyone should be able to mock server calls of all types. I decided that someone in the Neo4j community should do something.
So I built neo-forgery to mock Neo4j sessions.

I’m excited about it… It works really well! Now Neo4j users can enjoy the benefits of TDD and complete test coverage in their node apps.
Sample Neo-Forgery Usage
The README for neo-forgery tells you what you have to do, but let me take you through a quick example. This quick tutorial assumes a basic but minimal knowledge of node, Neo4j, and unit testing.
We’ll build a simple CLI that prompts a user for a movie title and gives facts about the movie, using Neo4j’s sample movies database.
Much of what’s below is not directly relevant to neo-forgery, but I want to be clear about how the code was built.
I’ll use TypeScript, which adds a few steps but shows how to use the exported types in neo-forgery. Of course, you can always use JS and ignore the typing. I’ll use AVA as a test runner.
If you just want to see the code, you can look at one of two repos: a partial one with the function and test that we build below or the sample final CLI.
Here are the steps we will take:
- Create an empty TypeScript project
- Build a Neo4j query in the data browser
- Store the query
- Store the expected query response
- Create a test
- Run the test
- Build the function using TDD
1. Create an Empty TypeScript Project
The following four steps are useful to create a TypeScript project and get started with testing using AVA.
(1) Run these commands in a terminal to create a project with the AVA test runner using TypeScript:
mkdir movieBuff
cd movieBuff
npm init -y
npm init ava
npm install --save-dev typescript ts-node
(2) Add this AVA specification to your package.json to use AVA with typescript, and to specify a test directory with files to test:
"ava": {
  "files": [
    "test/**/*.test.ts"
  ],
  "extensions": [
    "ts"
  ],
  "require": [
    "ts-node/register"
  ]
},
(3) Create the directory test and add a starting test file: test/sample.test.ts :
import test from 'ava';

const fn = () => 'foo';

test('fn() returns foo', t => {
	t.is(fn(), 'foo');
});
You can now open a terminal and call npm test within the project directory to confirm that it runs. You should see something like this:

Then delete test/sample.test.ts. You’ll have a real test soon.
(4) Add a tsconfig.json file with the following contents to enable certain things when we begin coding:
{
  "compilerOptions": {
    "declaration": true,
    "importHelpers": true,
    "module": "commonjs",
    "outDir": "lib",
    "rootDir": "src",
    "strict": true,
    "target": "es2017"
  },
  "include": [
    "src/**/*"
  ]
}
2. Build A Neo4j Query
We’ll use the sample movies database. You can create your own instance of the movies database by logging into Neo4j Sandbox.
Clicking the Open button next to the Sandbox will open up Neo4j Browser and automatically log you in. Once logged in, you should see a screen similar to the screenshot below:
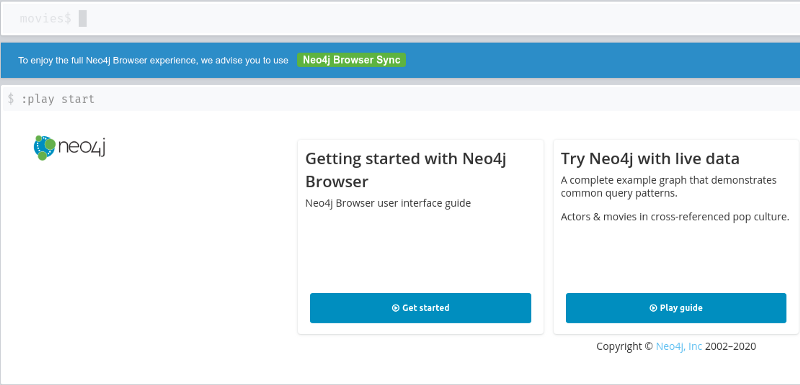
Then set up a query and sample parameter. I’ll just give you one for this example.
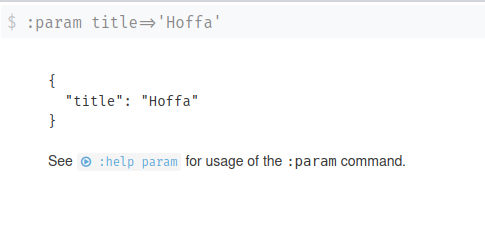
First create the parameter by entering :param title => 'Hoffa'. It should look like this:
Then run a query that uses the parameter:
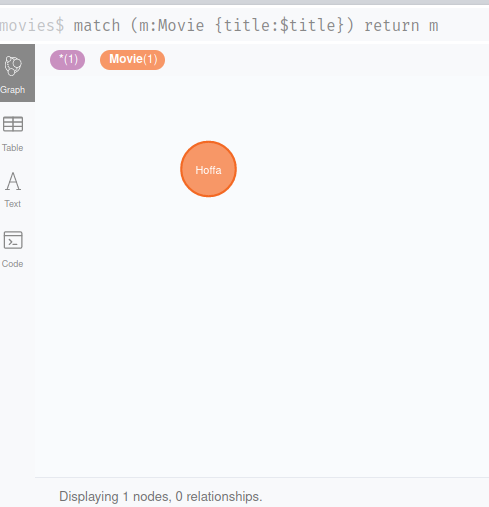
match (m:Movie {title:$title}) return m. You should see one result:
3. Store the query
Once it’s working, simply copy and paste the desired query into your code.
Store it in a new file filmQuery.ts with these contents:
export const filmQuery = `
match (m:Movie {title:$title}) return m
`
Move to the directory of your project in a terminal and run this to install the neo4j-driver:
npm i neo4j-driver
Now, create a file filmInfo.ts with an empty function that calls the query:
import {Session} from "neo4j-driver";export async function getFilm(title: string, session: Session) {
}We’ll build a test, expecting a failure, before we even create the function.
4. Store the Expected Query Response
Now comes the fun part — using neo-forgery to create a test that mocks an actual call to the query.
First, install neo-forgery:
npm i -D neo-forgery
Just to be tidy, create a subdirectory test/data. Then create a placeholder file test/data/expectedOutput.ts:
import {MockOutput} from "neo-forgery";export const expectedOutput: MockOutput = {
records: []
}Then go back to the query in the data browser. You can click on Code on the left, and click on Response:
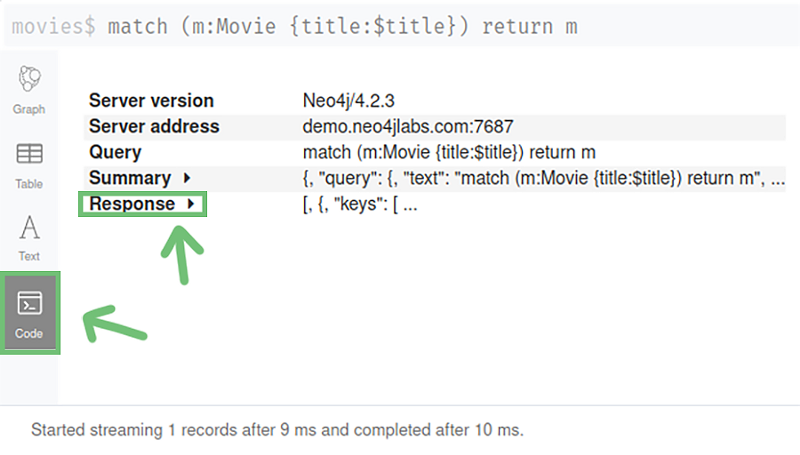
That will open up the response field, which you can highlight and copy:
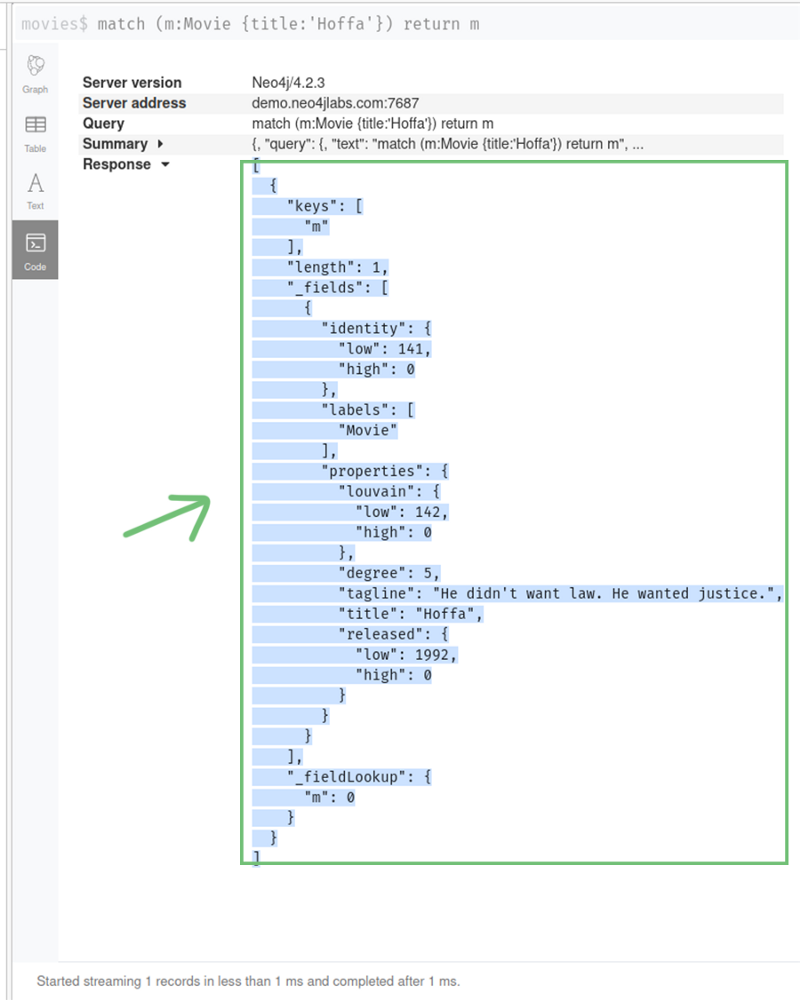
Paste that into test/data/expectedOutput.ts, replacing the [] with the actual response.
import {MockOutput} from "neo-forgery";export const expectedOutput: MockOutput = {
records: [
{
"keys": [
"m"
],
"length": 1,
"_fields": [
{
"identity": {
"low": 141,
"high": 0
},
"labels": [
"Movie"
],
"properties": {
"louvain": {
"low": 142,
"high": 0
},
"degree": 5,
"tagline": "He didn't want law. He wanted justice.",
"title": "Hoffa",
"released": {
"low": 1992,
"high": 0
}
}
}
],
"_fieldLookup": {
"m": 0
}
}
]
}5. Create a Test
Create the test file test/filmInfo.test.ts . Essentially, the file does this:
- Create a
QuerySetwith a single query. The query will use theexpectedOutputthat you’ve defined. - Use
mockSessionFromQuerySetto create a mock session from theQuerySet. - Test the assertion that your
filmInfofunctionreturnsexpectedOutputwhen called with your query.
Here’s the complete test file:
import test from 'ava'
import {
    mockSessionFromQuerySet,
    mockResultsFromCapturedOutput,
    QuerySpec
} from 'neo-forgery'
import {filmInfo} from '../filmInfo'const {filmQuery} = require('../filmQuery')
const {expectedOutput} = require('./data/expectedOutput')
const title = 'Hoffa'const querySet: QuerySpec[] = [{
name: 'requestByTitle',
query: filmQuery,
params: {title},
output: expectedOutput
}]test('mockSessionFromQuerySet returns correct output', async t => {
const session = mockSessionFromQuerySet(querySet)
const output = await filmInfo(title, session)
t.deepEqual(output,mockResultsFromCapturedOutput(expectedOutput))
})NOTE: This query set consists of a single query, meaning that only for this query will the server return any data. But you can make as many as you need. That’s helpful if you are testing a function that calls multiple queries, or creating a mock session that is used in multiple functions. You could even generate a single mock session that would emulate your database throughout your tests.
6. Testing the Function
Open a terminal for testing, and run npm test -- -w. That -w tells ava to run the tests continuously.
When you first run ava, you should see something like this:
$ cd $CURRENT && npm test -- -w
> movieBuff@1.0.0 test
> ava "-w"
✖ No tests found in test/data/expectedOutput.ts, make sure to import "ava" at the top of your test file [10:47:23]
─
filmInfo.ts › mockSessionFromQuerySet returns correct output
test/filmInfo.test.ts:25
24:     const output = await filmInfo(title, session)
   25:     t.deepEqual(output,mockResultsFromCapturedOutput(expectedOutput…
   26: })
Difference:
- undefined
  + {
  +   records: [
  +     Record {
  +       _fieldLookup: Object { … },
  +       _fields: Array [ … ],
  +       keys: Array [ … ],
  +       length: 1,
  +       ---
  +       Object { … },
  +     },
  +   ],
  +   resultsSummary: {},
  + }
› test/filmInfo.test.ts:25:7
─
1 test failed
That’s because our output from our function is currently undefined, and our mock server is expecting the result that we have generated using neo-forgery.
7. Build the Function
Now we will modify the code until we get a reassuring green 1 test passed in our testing monitor.
If you need to learn how to work with neo4j results, you can check out their API documentation. Here’s a solution that will work:
import {Session} from "neo4j-driver";
import {filmQuery} from "./filmQuery";
export async function filmInfo(title: string, session: Session) {
let returnValue: any = {}
try {
returnValue = await session.run(
filmQuery,
{
title,
})
} catch (error) {
throw new Error(`error getting film info: ${error}`)
}return returnValue
}
Ava gives us instant positive reinforcement!

I could stop the article here since you already know how to use neo-forgery to mock the code. Everything else below you could learn from Neo4j documentation or other sources.
But there are some stylistic errors here. Extracting the query results to get what we need should really be done inside of filmInfo. So let’s go back to the browser, see what we really need, and modify our test and code.
Clicking Table in the left column will show in tabular form the records being returned:
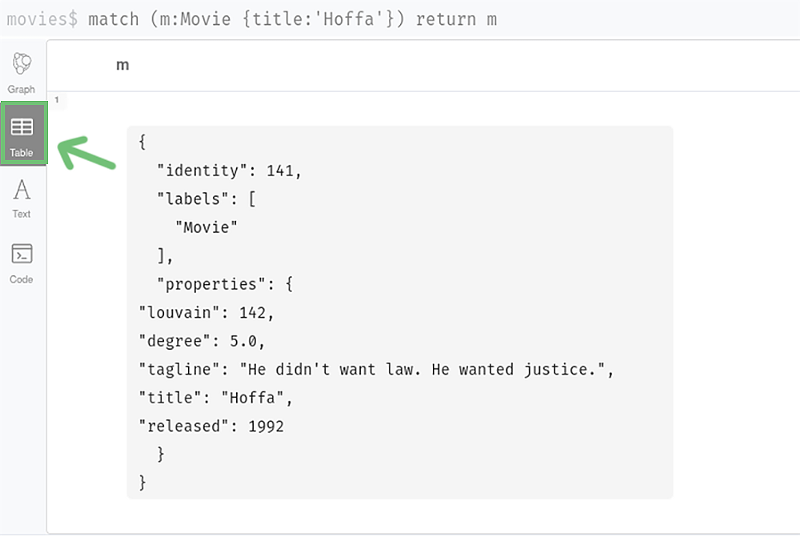
Let’s say that for us, released (we’ll call that year) and tagline constitute info about a film. Store the following interface declaration in FilmFacts.ts:
export interface FilmFacts {
year: number;
tagline: string;
}Then we can modify the test to expect an instance of FilmFacts. The contents of the instance filmFacts can be lifted directly from the data browser. The additions and modification are shown below in bold:
import {FilmFacts} from '../FilmFacts'
...const filmFacts:FilmFacts = {
tagline: "He didn't want law. He wanted justice.",
year: 1992,
}test('mockSessionFromQuerySet returns correct output', async t => {
const session = mockSessionFromQuerySet(querySet)
const output = await filmInfo(title, session)
t.deepEqual(output,filmFacts)
})NOTE: Updating the query to return just those would probably be ideal, but we’ll modify our code for this example.
Of course, this change to the test causes our test to fail, and again we update the code until it succeeds. This works:
import {Session} from "neo4j-driver";
import {filmQuery} from "./filmQuery";
import {FilmFacts} from "./FilmFacts";
export async function filmInfo(title: string, session: Session):
Promise<FilmFacts> {
let returnValue: any = {}
try {
const result = await session.run(
filmQuery,
{
title,
})
const movieProperties =
result.records[0].get('m').properties
returnValue = {
tagline: movieProperties.tagline,
year: movieProperties.released.low
}
} catch (error) {
throw new Error(`error getting film info: ${error}`)
}
return returnValue
}Again, for a real program, I’d change the query for a cleaner code. But I’m intentionally letting you see how neo-forgery can handle even complex query results. You can see the code that we’ve developed so far here.
While it’s outside the scope of this tutorial, there should be handling of the common error of no data being returned. See the filmInfo.ts file in the sample complete solution for an example.
In short, we have created and tested a neo4j query, without ever having to make a session call!
Completing the project to the point shown in the sample complete solution is trivial. Basically, add a .env file with the movie database credentials and an index.ts file that calls the real database with the credentials. And you have to create an interactive function that prompts the user for a movie title and returns the code. For the sake of decency, I added linting, test coverage, and .gitignore.
Enjoy, and open an issue with any problems or requests! The rest of this article explains how to customize your .run() method in a mock session for more fancy tests.
Custom Session .run() Contents
The sample above is a straightforward use of mockSessionFromQuerySet.
Sometimes, you will need some functionality in your test that is not covered by the session returned by mockSessionFromQuerySet.
That’s most easily done simply by overwriting run() for your mock session instance. You can even change it to just one test. For instance, in the sample complete solution, you can see that the filmInfo test contains two cases where I overwrite the session run() method to return a needed error. See the boldfaced code below:
function mockRunForTypeError(){
    const e = new Error('not found')
    e.name = 'TypeError'
    throw e
}

test('filmInfo NonExistent Film', async t => {
    const emptyFilmFacts: FilmFacts = {year: 0, tagline: ''}
    const session = mockSessionFromQuerySet(querySet)
    session.run = mockRunForTypeError
    const output = await filmInfo('nonExistent', session)
    t.deepEqual(output, emptyFilmFacts)
})
You can also create your own run() from scratch, including queries for whatever else you need. For that, use mockSessionFromFunction(sessionRunMock: Function) instead of mockSessionFromQuerySet.
You can create anything you want in the function. The only caveat is that your function should return an array of Neo4j Records. Toward that end, neo-forgery offers two helpful functions:
mockResultsFromDatawill take in an array of records and convert them to neo4j Records.mockResultsFromCapturedResultwill take a captured query result and convert it into neo4j Records.
For instance:
const sampleRecordList = [ {
 “firstName”: Tom,
 “lastName”: Franklin,
 “id”: “2ea51c4a-c072–4797–9de7–4bec0fc11db3”,
 “email”: “tomFranklin1000@gmail.com”,
}, {
 “firstName”: Sarah,
 “lastName”: Jenkins,
 “id”: “2ea51c4a-c072–4797–9de7–4bec0fc11db3”,
 “email”: “sunshineSarela@gmail.com”,
}]
const sessionRunMock = (query: string, params: any) => {
return mockResultsFromData(sampleRecordList);
};const session = mockSessionFromFunction(sessionRunMock)
Summary
The neo-forgery tool creates a very efficient stub that mocks a real neo4j-driver session. You can now create code and test it without any more calls to your database.
This opens the door to Neo4j users for quick test-driven development.
Get Aura Free
How to Mock Neo4j Calls in Node was originally published in Neo4j Developer Blog on Medium, where people are continuing the conversation by highlighting and responding to this story.


